Jul 1 2005, 09:53 AM
Dennis,
Good questions. Actually I don't recall discussing these points,
so I'll do so now.
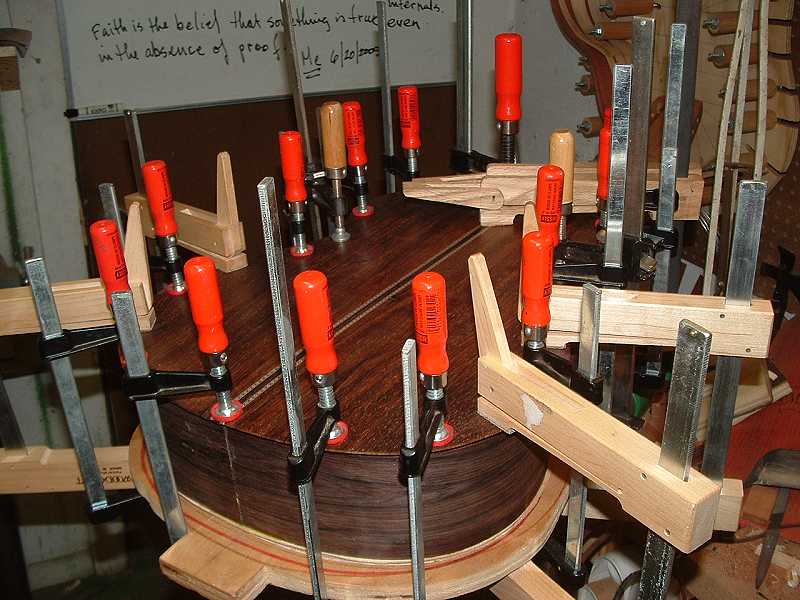
My top and back attachment methods have evolved to the point
where you see them now. I prefer installing the top using tentellones
because, even though it might take a little longer, it is inherently
more flexible, and it is easier to boot. I decided to space out
the tents the way I do now after seeing the interiors of a couple
of very nicely built guitars, and decided that I really liked
the look, and realized it would also take about half as long.
I don't think that spacing out the tents affects the structural
integrity of this joint at all, especially once the binding and
purfling have been glued into place.
I used to install kerfed linings for the back, but have switched
over to solid ones for my last few builds. Once again, I like
the cleaner look. Like many other builders, I use basswood for
the linings. Basswood, however, does not like to bend all that
well. It tends to wrinkle at the waist bend and it tends not
to want to hold its bent shape. So, to get around this, I cut
the lining strips about 0.100" (2.5mm) thick, and then bend
them, which elminates the chance of developing a wrinkle at the
waist bend. And then, I laminate two of the strips together,
using my mold for side bending, clamping them down on the mold.
This works well. When they come off the mold after the glue has
dried, they are quite rigid and there is essentially no spring
back. Thus they actually help to preserve the side shape. The
final thickness of about 0.200" some would say is too thick,
but I don't agree. Kerfed linings are also about this same thickness.
Hope that helps some.
Best, Michael
Jul 5 2005, 12:22 PM
Things have been kinda hectic around here lately. I was initially
hoping that I could have Stephen's 10-string finished in time
for the First International 10-String Guitar Festival being hosted
by Janet Marlow in Litchfield, CT. That isn't going to happen,
unfortunately, but at least one of my guitars will be there.
And it will be in some very heady company.
Today is the day for getting everything packed, and tying
up the loose ends. Tomorrow I'll be flying out of Houston for
Hartford, CT, where I will meet up with Stephen. We'll be sharing
a rental car for the 40-or-so mile drive into Litchfield.
It pretty much goes without saying that I'm looking forward
to this. This will be my first opportunity really to exhibit
my work in a more formalized setting.
I'll be back Sunday evening, and some time next week, I'll
be sure to post a full report.
Best, Michael
Jul 5 2005, 12:30 PM
Meanwhile, the work on number 9 has continued. I've made quite
a bit of progress since my last build update, so I think I'll
break it up into a couple or three smaller posts.
Tell you what, though, it's been really hot down here. How
hot? Well, not Phoenix hot, but hot enough!
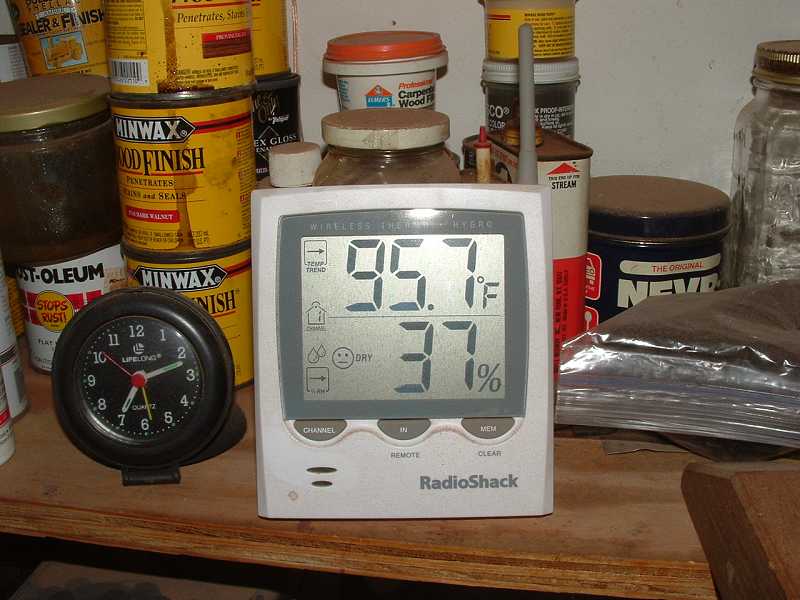
Yeah, but it's a dry heat. Yeah, right. That's the the
temp being read by the outdoor sensor. See the time? That's in
the PM, btw. At midnight it's still often above 90F.
Inside the shop, with the little window unit A/C wheezing
away, it's a balmy 80 degrees
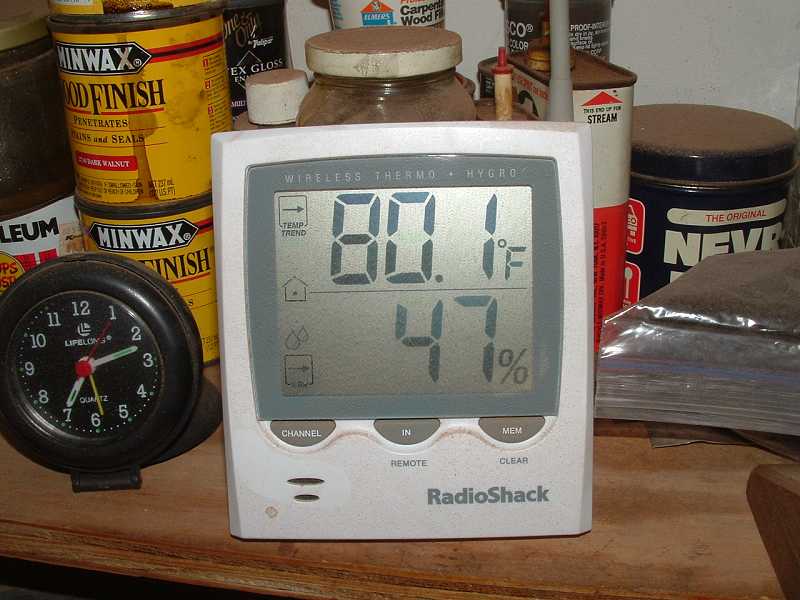
This helps some:
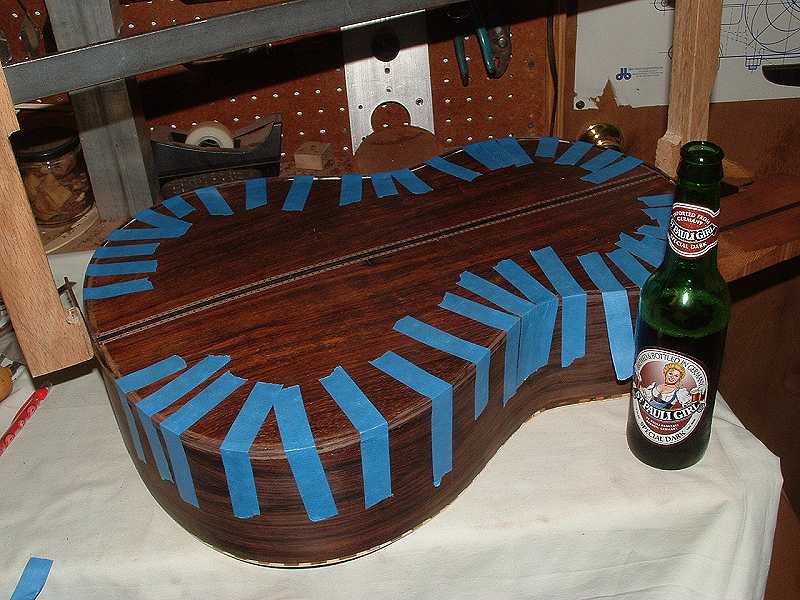
Easy does it though, or else my mitres will start getting um
-- approximate.
Best, Michael
Jul 5 2005, 12:37 PM
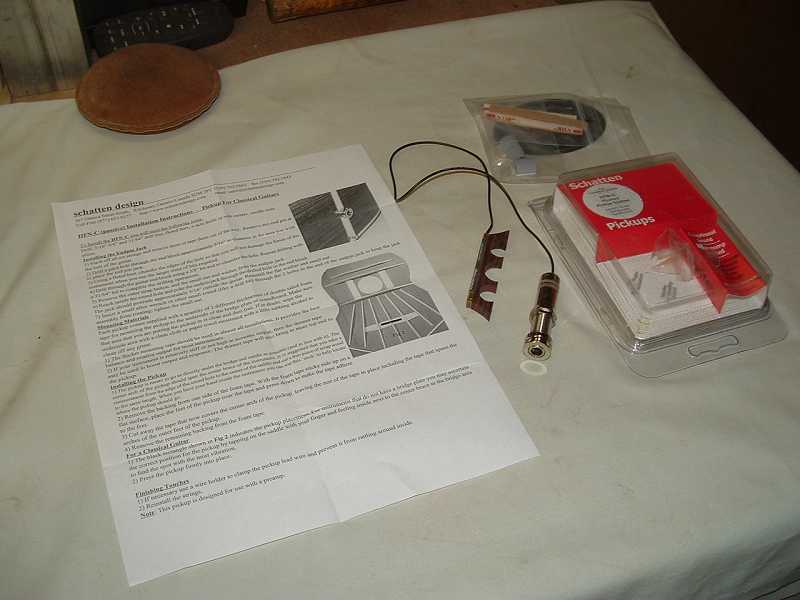
Stephen has decided he wants a pickup mounted in this guitar.
He chose a Schatten model. Here's a shot of what you get with
this one -- it's the passive model, which requires an external
pre-amp. Glad he elected to go with this style PU, cuz that way
I don't have to cut a big hole in the side.
Here's a close-up of the pickup and the jack. Yup, that's a piece
of EIR it's bonded to.
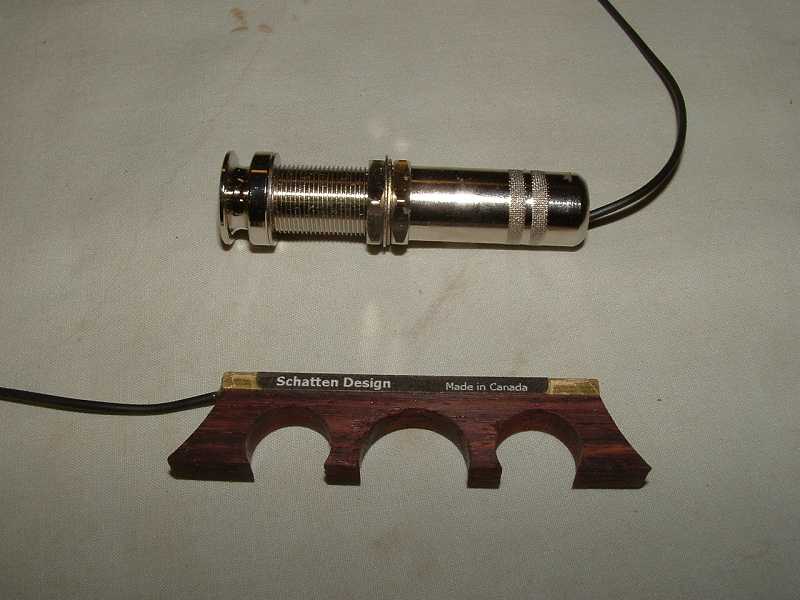
Call me anal, but I decided to go ahead and contour the pickup's
feet.
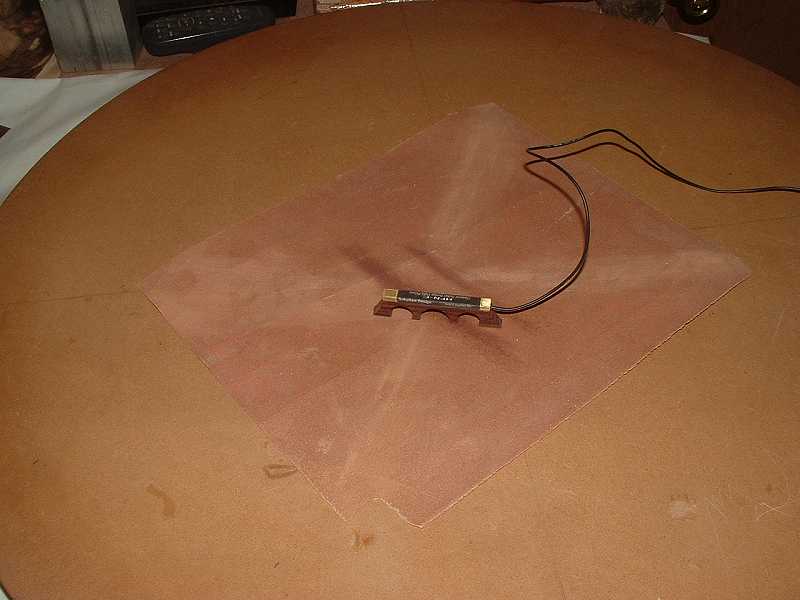
The pickup is fastened to the soundboard using a thin foam adhesive
strip. I located it exactly along the bridge saddle centerline.
Then, I decided to cut the bridge caul and tape it and the pickup's
jack in place before gluing down the back. It wasn't strictly
necessary to do it this way, but it makes for an easier installation,
I feel.
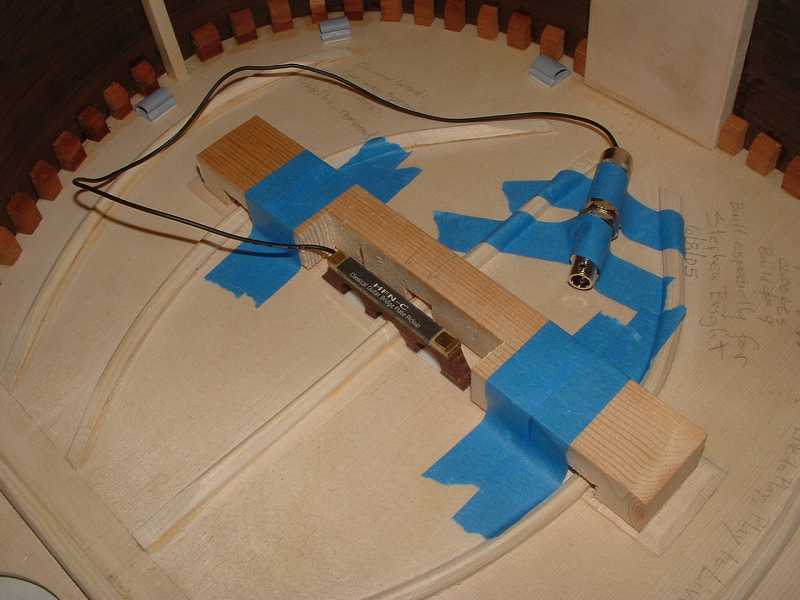
Then I inletted the sides and linings for the back braces, and
glued down the back
Next up, routing, binding and purfling.
Best, Michael
Jul 5 2005, 12:51 PM
I got to try out my new DeWalt laminate trimmer on this guitar.
Rather than use the standard base, which has sufficient adjustments
to make the various stair-step cuts I needed to make, I elected
to use instead the router bit set I bought from Tracy. I thought
the accuracy might be a little better.
Turns out there was still a fair amount of variability between
the binding channel and the outer edge of the purfling ledge
-- enough to where I had to improvise a solution.
The binding is EIR. I could have tried using offcuts from
the Brazilian sides, but they had already been thicknessed down
to such a point that I was afraid I'd burn through the binding
in places, when scraping everything down. So I decided on some
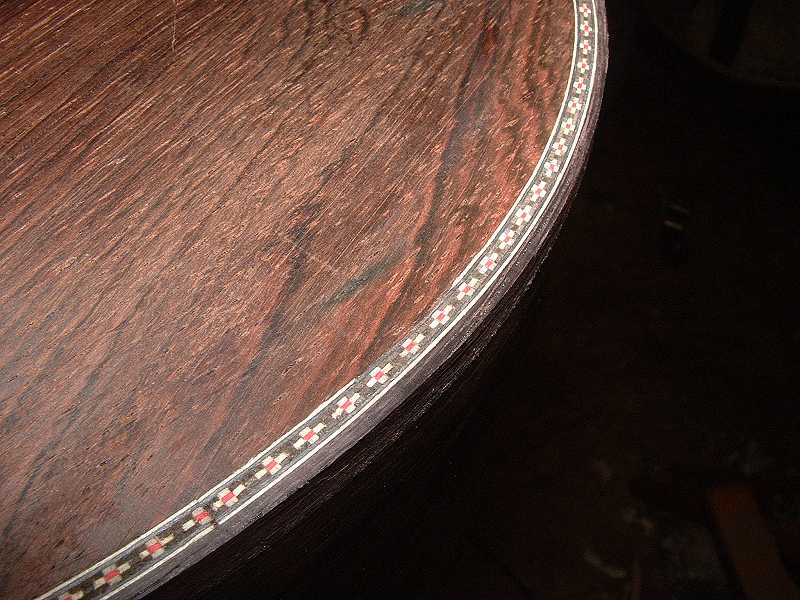
nice looking EIR instead. The binding installed easily.
To install the side purfling, I decided to try an approach
outlined by Rik Middleton in his book.
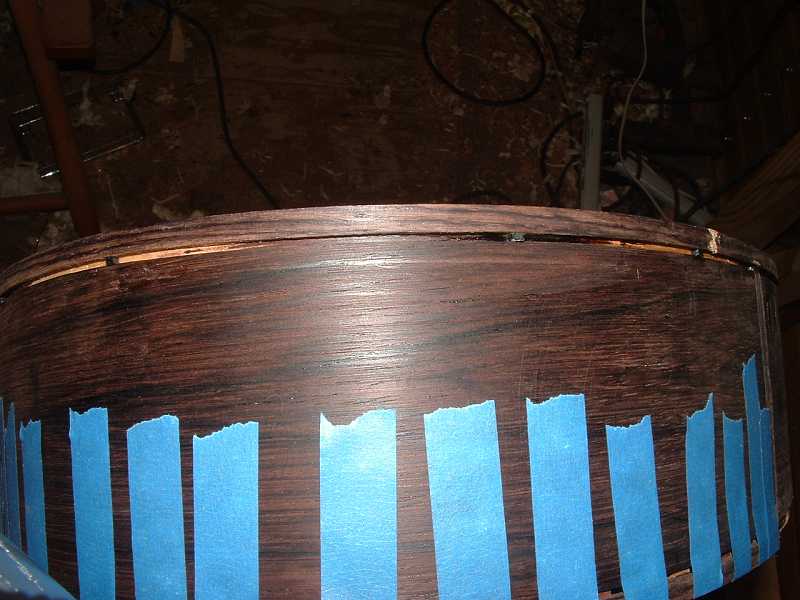
You'll note the small pieces of purfling glued in place along
the binding channel. They act as spacers to give the binding
the right amount of standoff. After everything has dried, I take
my 1mm graver, and chisel out the purfling pieces.
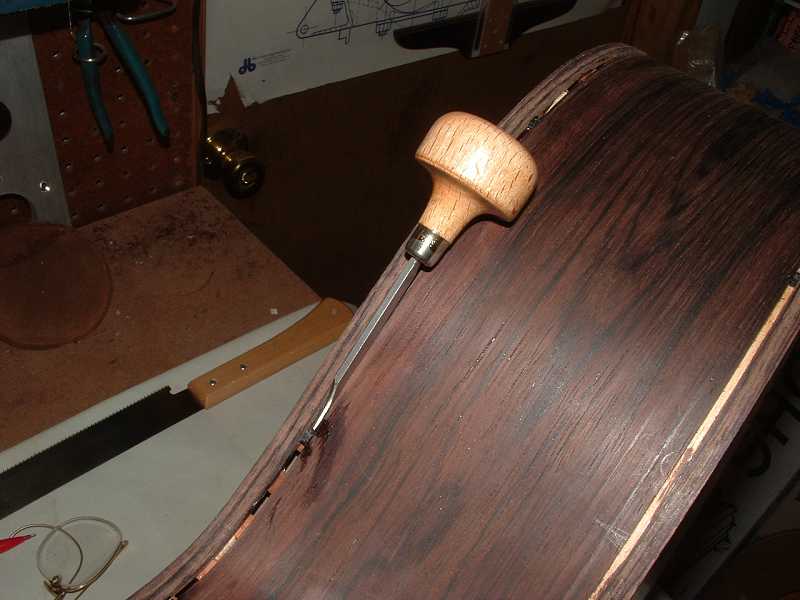
Then I take the purfling, soak it for a few minutes in water,
and push it into the channel. I use the butt end of an X-acto
knife to push it all the way in place. There were a few places
where the channel was a tad too narrow, and I used the X-acto
knife to trim just enough away at these spots so the purfling
would fit.
After than, I mixed Titebond with water to make a "glue
soup." Not too thin. I spread the soup liberally over the
purfling and let it soak in for a few minutes -- the purfling
kinda acts like a sponge; it actually soaks in pretty quickly.
Then wiped away the excess and taped it down along spots where
it might not fit all that tightly.
Best, Michael
Jul 5 2005, 12:59 PM
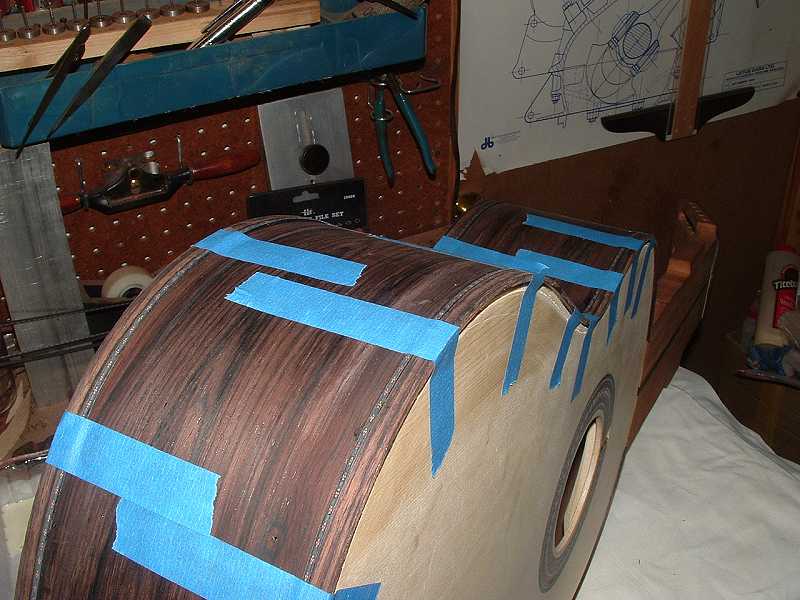
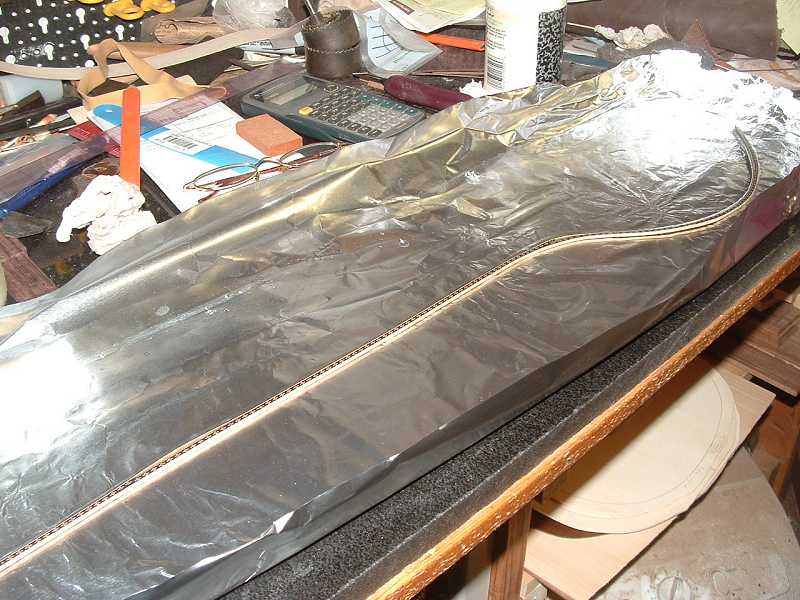
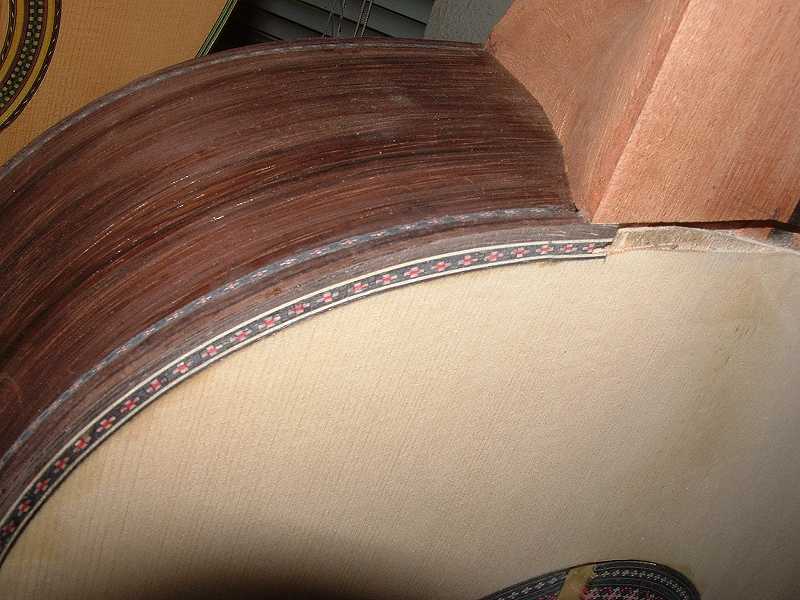
Next came the top purfling. This is really wide stuff, and fragile
to boot.
Here's a shot of a soaking tray I made out of aluminim foil
with one piece of the top purfling in it. If you look closely,
you can see where it separated when I tried to bend it on the
mold.
The purfling for the top originally had black strips on the outside,
but I ended up having to remove one of them -- the strip that
would ordinarily lay against the binding -- to reduce the width.
Even though I measured more than twice before I cut once, the
router bit cut the channel a little narrower than I needed, so
in order to get it to fit, I had to remove that strip. No biggie.
Here's the way it looks after being installed.
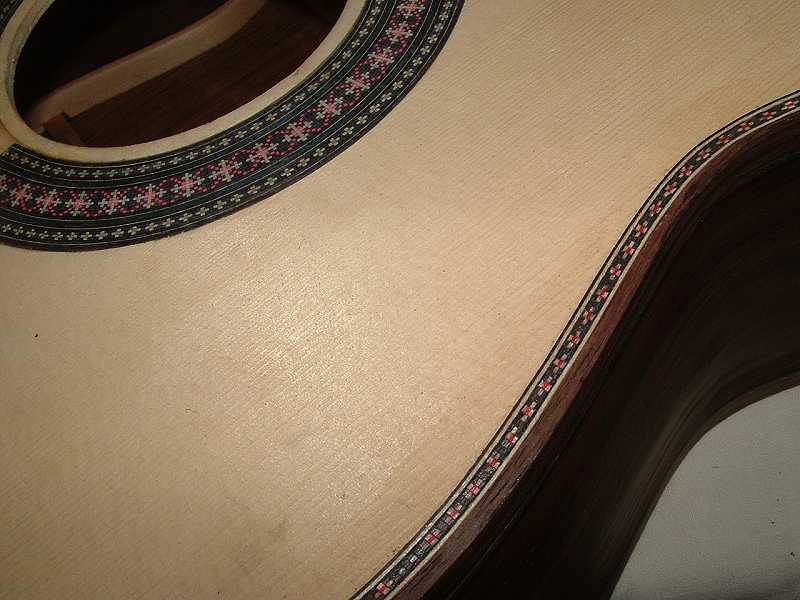
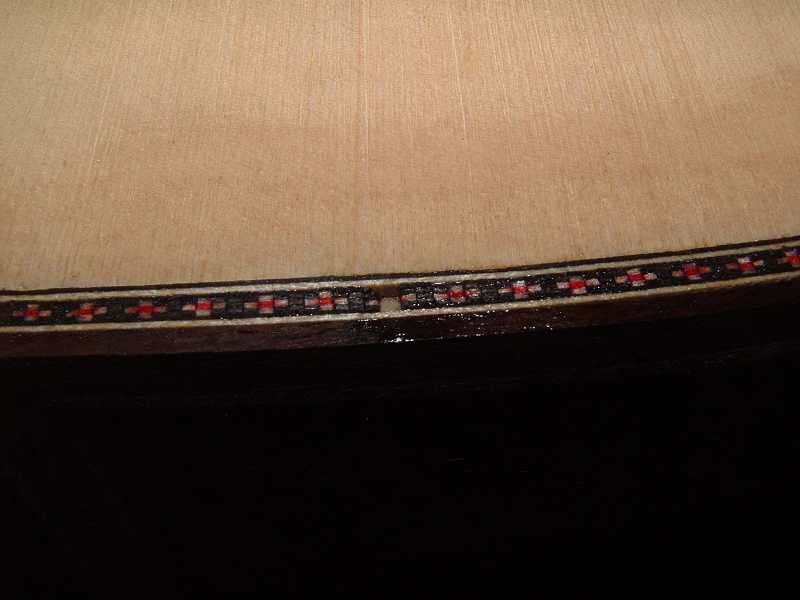
I used the same "glue soup" method for this purfling
as well. It really does not like to bend. Because it is so wide,
there is a significant difference in the length of the arc of
the inside strips of wood compared to the outside strips once
you start trying to bend it. And if you try to force it, the
fragile interior mosaic begins to shear and separate. The solution
was to cut the purfling after a certain length of bend, and to
butt up a new piece, trying to match the pattern as closely as
possible.
I still have a little bit left of the top's purfling to do,
but I dunno if I'll have the time to do it before I leave for
the Festival. The back's purfling is definitely gonna have to
wait till I get back.
That's it for now.
Best, Michael
Jul 5 2005, 01:16 PM
Michael,
You really have the binding/purfling process down pretty well.
I admire your willingness to jump in and do it.
With time the EIRW binding will color itself to a more brown
color tone and should blend right in. I see I need to really
study the R. Middleton space block description some more. Seems
to work quite well for you.
Good luck at the festival. Hopefully all will welcome another
10 string builder. If not it's their loss. Have fun.
Steve
Jul 5 2005, 03:24 PM
Thanks for the nice words, Steve. The old saying is true, though
-- you know, the one that goes something like, the more experienced
you get the better you are at hiding your mistakes? In this case,
it isn't really mistakes, just slight inaccuracies that lead
to gaps and tight spots. I've just gotten better at hiding them,
is all, but I tell you what -- the biggest help in this regard
has been moving to the use of a heating blanket and mold, instead
of trying to bend this stuff by hand over a pipe. Not only is
it much more accurate, it's way faster. A very good investment,
it was.
I haven't felt the need to do the space blocks the way Middleton
outlines in his book until now. And it was due to the fragile
nature of the purfling.
With my other builds, what I've done, with good results, has
been to glue the purfling to the bottom edge of teh binding strips
before bending them, and then bend. If I bend them dry, things
usually work out okay, although I have had an occasional separation
between the binding and purfling due to the heat making the Titebond
maleable. I find, though, that if I clamp it down when it's still
warm, I can usually correct this.
Right now, I think the EIR and Brazilian are already very
close in color. This is a very dark set of Brazilian, so I think
using EIR as binding will be something almost nobody will notice.
The 10-string community is a small one. But the number of
builders who build 10-strings is much smaller. So, my experience
has been one of being greeted with enthusiasm over the news that
there is another builder of 10-strings out there.
In fact, when Janet Marlow learned I was coming, she asked
if I would give a talk on building a 10-string to the Festival
attendees. Of course, I was more than happy to say yes.
There will be at least one player there who has a fair amount
of experience in building 10-strings -- Perf De Castro, who is
also a member here. If I recall correctly, Perf helped a luthier
with the construction of his first 10-string, and then more recently
he did a major overhaul to that guitar, replacing the fingerboard,
which is no small feat, so he's a luthier, as far as I'm concerned.
Anyway, it will be a lot of fun getting to compare notes with
him as well.
I'm planning to take not only my camera, but calipers and
a tape measure so I can sample various metrics of the guitars
at the festival. I feel not unlike a paleontologist being turned
loose on a virgin bonebed.
Best, Michael
Jul 14 2005, 07:15 PM
Okay, now that things have begun to return to normal after the
10-string Festival, I've had a chance to turn my attention back
to build #9. The night before I left for Litchfield, I managed
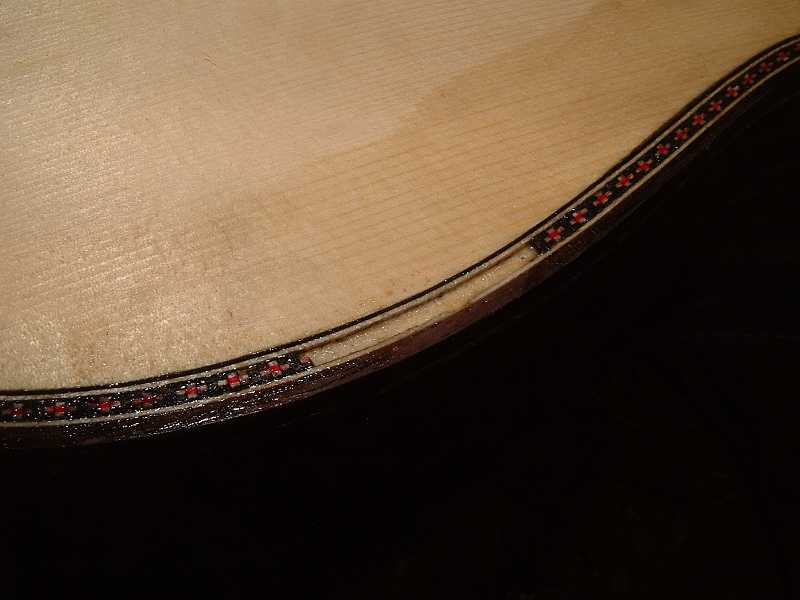
to glue down the last of the purfling.
Scraping down this delicate purfling was interesting. I got
what I call "blowout" along the top and "burn
through" in a couple of spots on the back. To me, "blowout"
is where hunks of purfling fall out when scraping, and "burn
through" is when the purfling wasn't completely seated in
its channel, resulting in total removal of the purfling or parts
of it in spots while scraping.
I suspect the reason why the hunks of purfling fell out was
because of the Titebond soup I used to glue it down. Even though
it soaked well into the mosaic, the bond was not sufficient in
a few places. So, I went back over all the purfling with
thin CA.
Some spots were bigger than others.
Now I wish I had a good explanation as to why I decided to saturate
the purfling with CA before I replaced the blown out areas.
When I think of it, I'll add it in a future post.
So, I had to go back into the channel and chisel out the dried
CA in prep for the new purfling.
The burn through on the back was less obvious. Just a couple
of short sections of the white inner purfling line was lost,
which necessitated trimming off a bit of white, deepening the
cut for the white line, and gluing it in place. Using CA this
time, of course.
Still, all in all, the guitar is coming along pretty nicely.
Here are a few shots after I finished scraping down the binding
and purfling and repairing the blow outs and burn throughs.
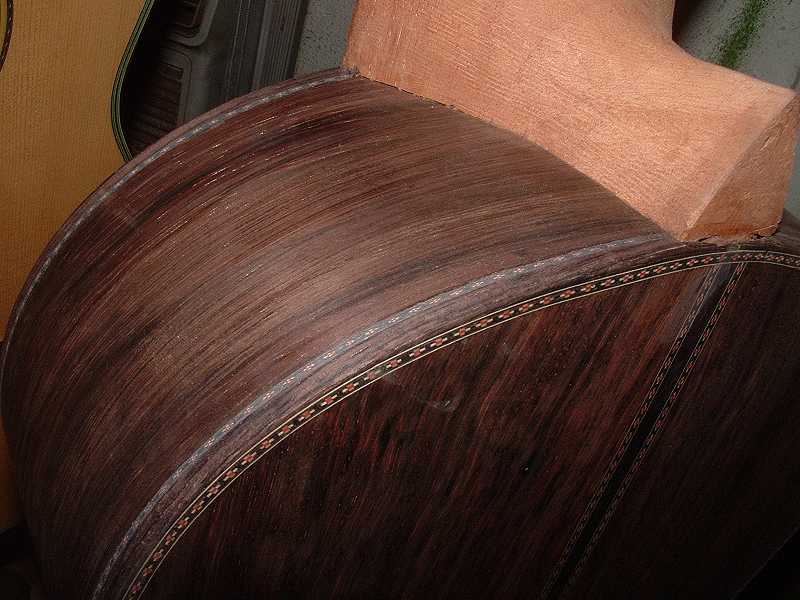
The Brazilian rw has several small wormholes that I've begun
to fill. I discovered that my thick CA has gone off, and no longer
hardens. It made a lovely mess, so I had to scrape and sand it
off, and fill with some fresh medium CA.
Tomorrow, more sanding and probably a bit more filling. Then
I'll get to install the fingerboard and begin contouring the
neck.
Best, Michael
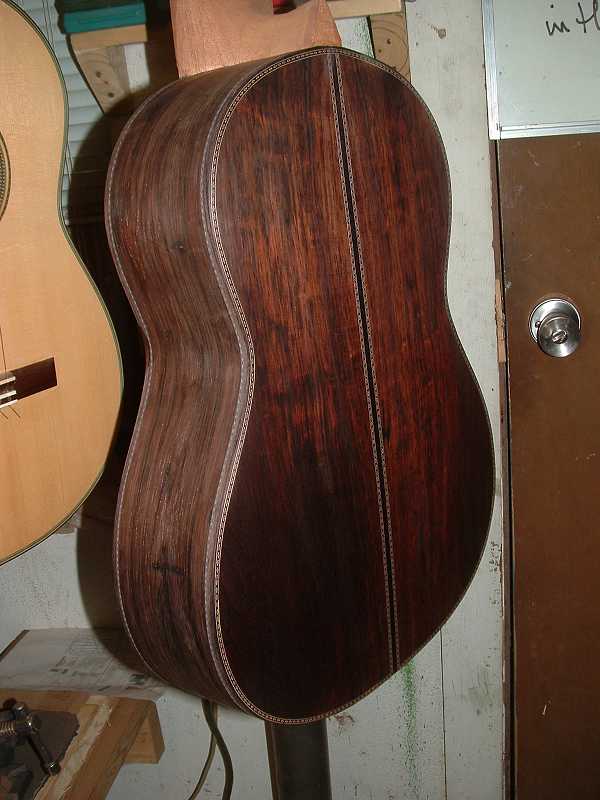
Jul 26 2005, 04:33 PM
Welp, more interruptions, including a shoulder injury I sustained
picking up a recalcitrant 65 lb. canine, set me back a bit on
this build. I've been making tolerably good progress for the
past several days, though.
Here's the latest:
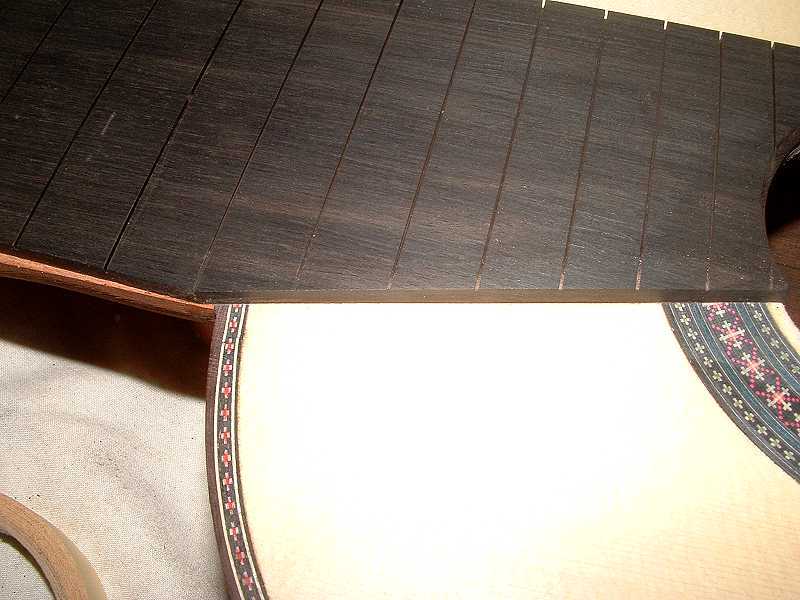
After getting all the purfling squared away, I installed the
fingerboard, and then contoured it for bass string relief. As
I mentioned earlier with the first 10-string build, a lot of
relief needs to be planed into the fingerboard because those
big, floppy bass strings move around a lot. After doing the contour,
I sanded down the fb with a homemade sanding block I use, made
out of a 2"x 3" x10" piece of aluminum, to which
I have glued down a piece of 80 grit sandpaper. Such a stout
block makes it a lot easier to sand out any irregularities to
the contour.
However, afterward, because of the depth of the contour, the
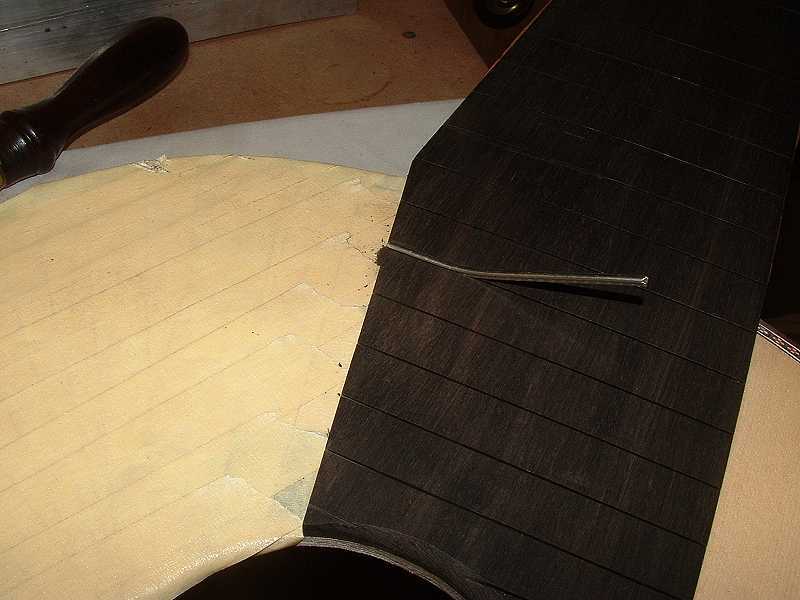
fret slots are no longer deep enough.
So, I had to recut the slots (I taped up the upper bout area
first, though), and then checked them with a piece of fret wire
with the tang barbs removed that I use as a depth checking tool.
Installing, leveling, and recrowning the frets was next. I don't
mind admitting that recrowning frets is not one of my favorite
lutherie-related activites. But it is an absolutely essential
one. The following shot was taken before I'd masked off the entire
fingerboard.
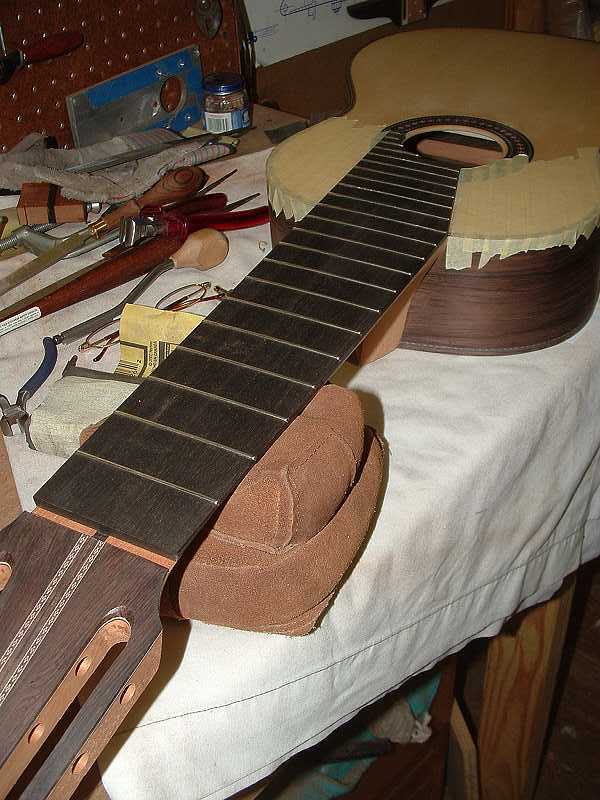
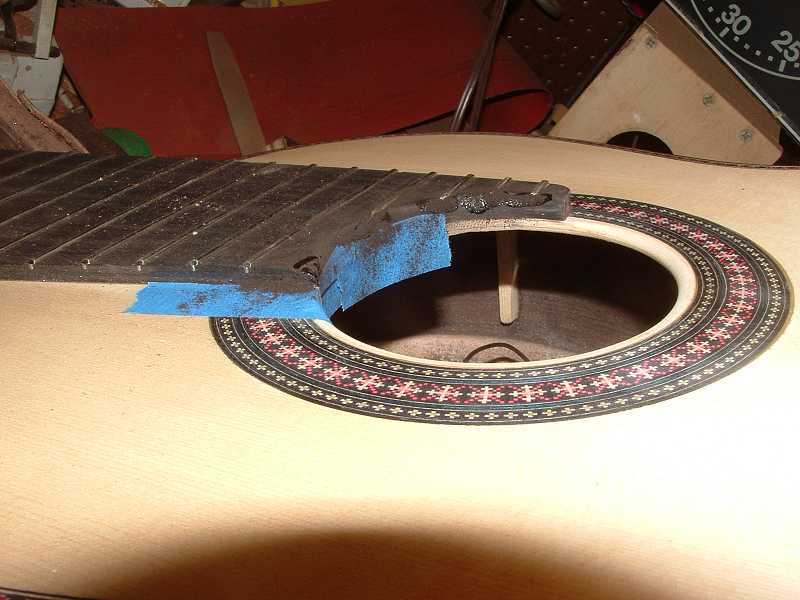
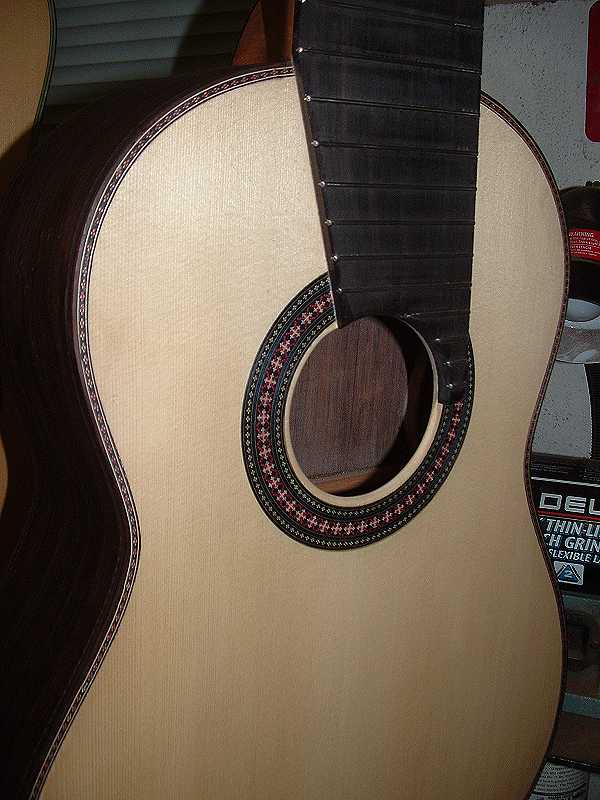
After installing the frets, it's time to tidy things up a bit
around the soundhole. I decided not to install that tiny vestige
of the 19th fret above the soundhole. It never gets used on a
10-string, so I just filled it's little slot with CA and ebony
dust. Filled gaps around a few of the other frets too. Looks
messy now, but wait a while . . .
Somewhere, when all this was going on, I installed the heel cap.
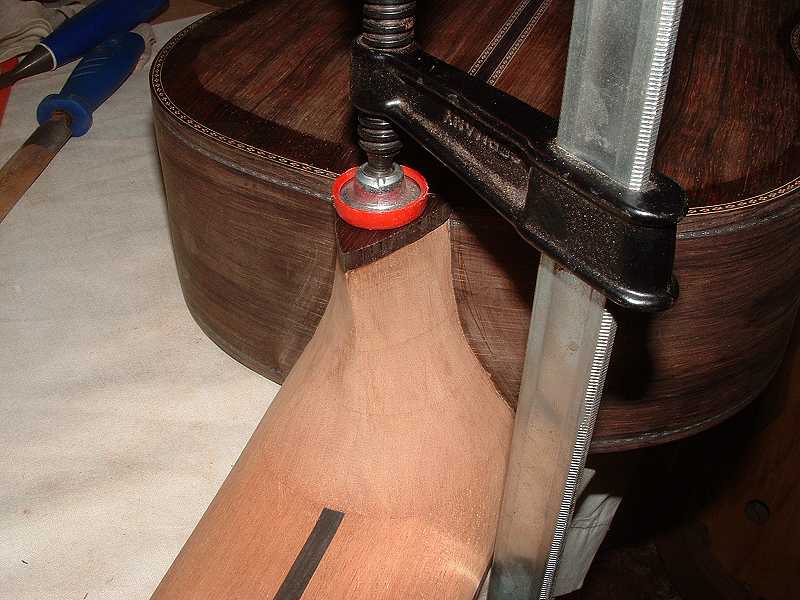
I think this will be the last heel cap I install for a while.
Next build, I'm gonna try leaving an extension of the back in
place to act as a cap, and lay purfling/binding around it, instead
of installing a separate cap. I noted at the Festival that both
Nunez and Bernabe did this.
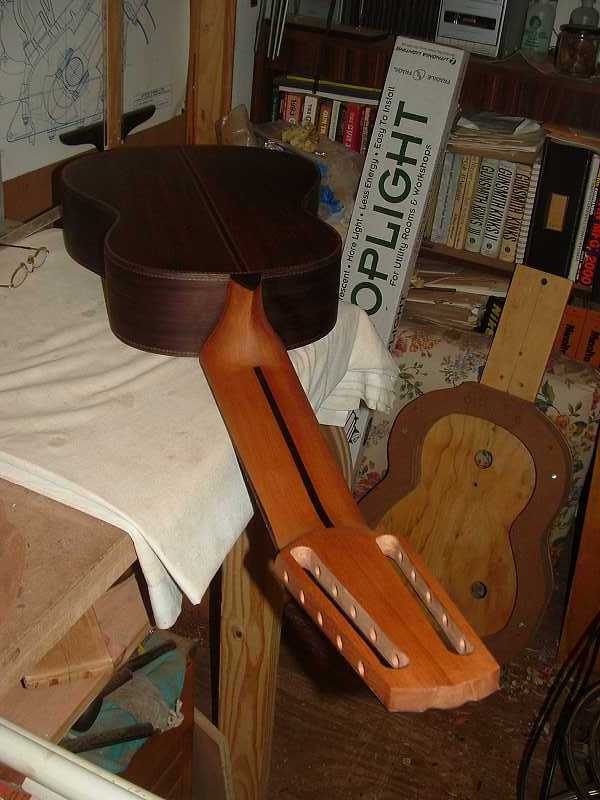
Once the fingerboard was installed and all, I finally turned
my attention to contouring the neck. I start out with spokeshaves,
graduate to rasps, then files, then sandpaper, and finally steel
wool. I'm still at the rasp stage in the following image.
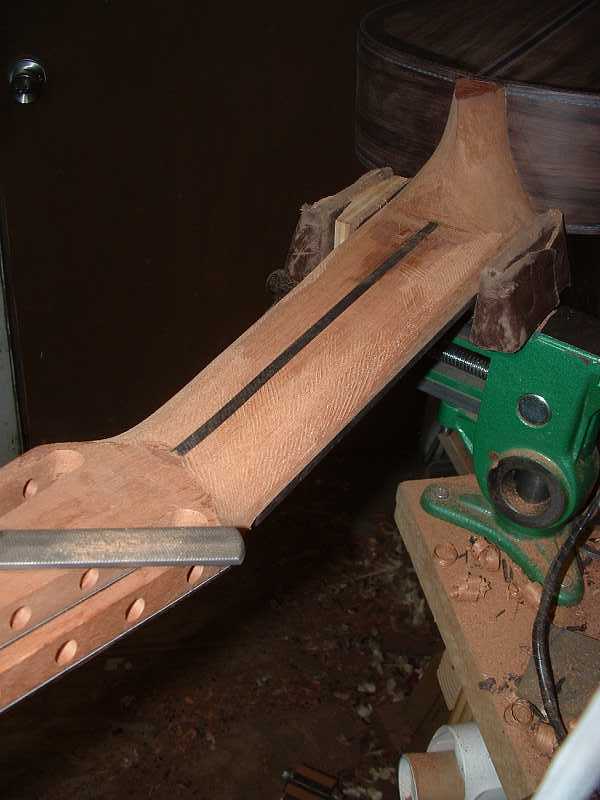
But it doesn't take too long to get to this:
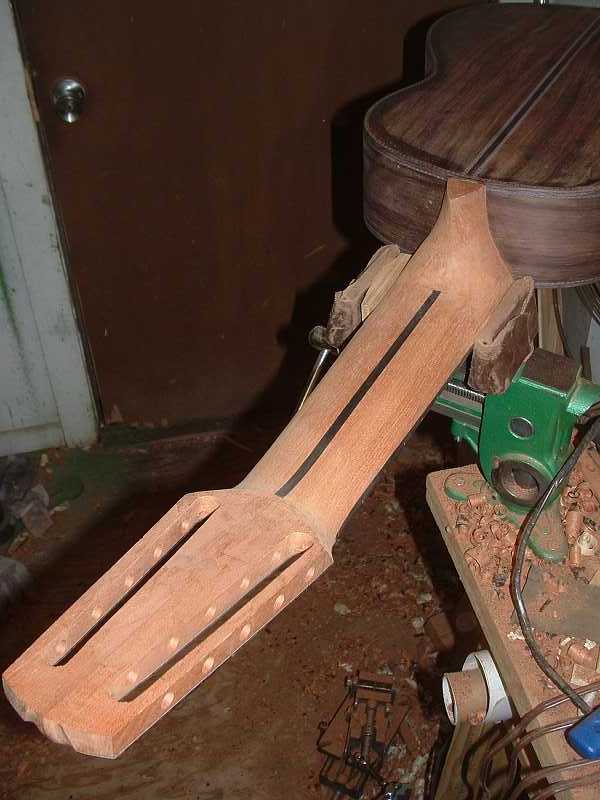
Still only about halfway done with the neck, though. I still
had a few hours of gentle contouring and sanding ahead of me.
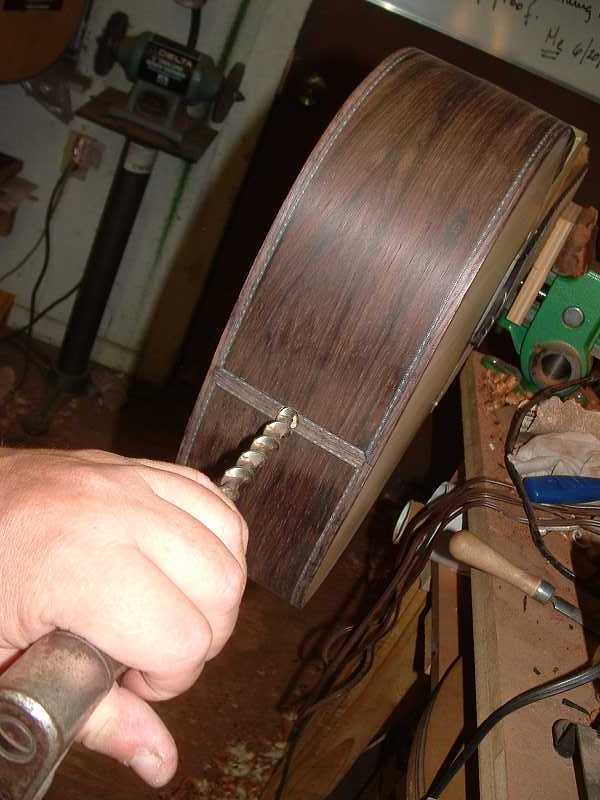
I've been putting off drilling a hole in this guitar long
enough. Time to pull out the old bit brace and a 1/2" bit
and drill a hole for the pickup jack. Initially, I tried using
a Forstner bit. Way too slow, but it started a clean hole. A
bit brace is fast and usually cuts a very clean hole, as well.

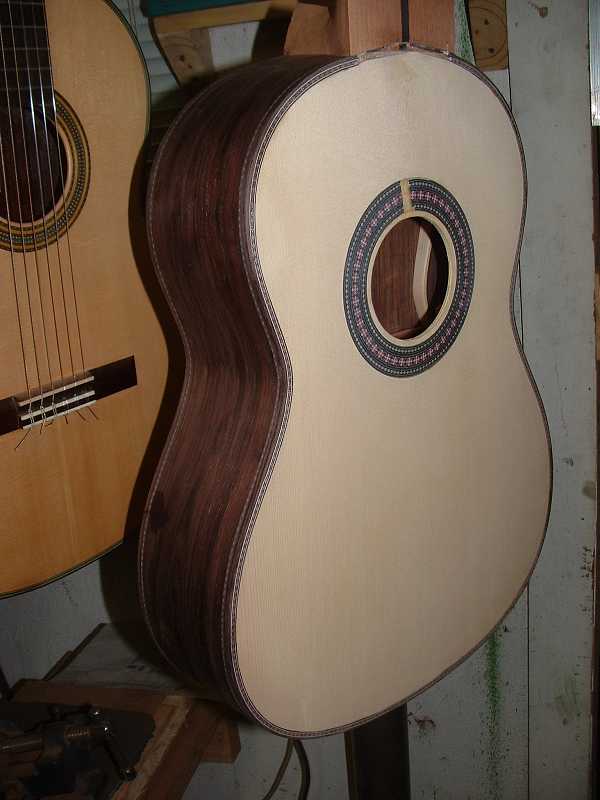
A moderate close-up of the front of the guitar. The image is
a little dark, but I think you can see that the fills I made
at the end of the fingerboard came out pretty well.
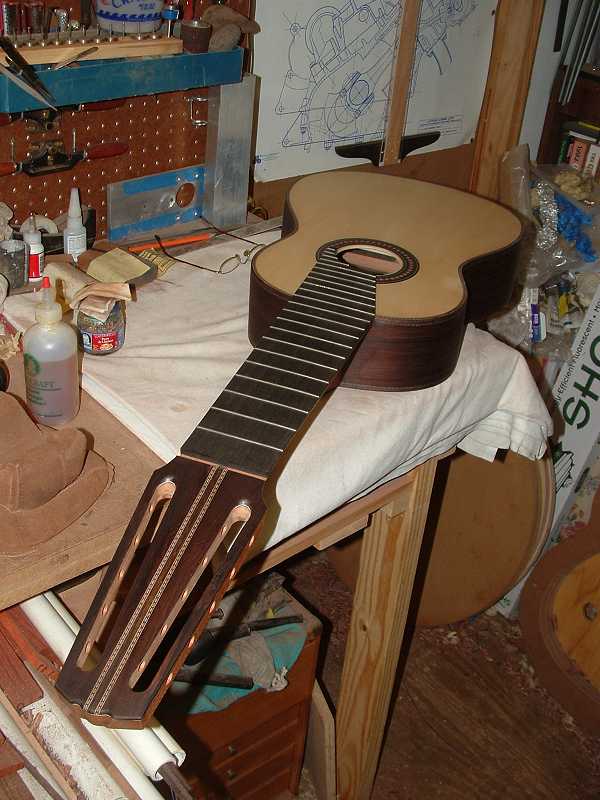
The above photo was taken after a couple of wash coats of shellac
had been laid down. Here's a couple of shots of the rest of the
guitar after the wash coats of shellac.
Next, I'm gonna fill the pores. That should be fun.
I hope to have this guitar finished by the weekend. So far,
we're on track.
Best, Michael
Jul 26 2005, 04:42 PM
Michael,
Your details are coming out well.
That sure is one big neck though. Hard for me to believe the
size of the thing I had not seen your pictures.
The B Rosewood looks great with the mahogany.
Steve
FIRST
PAGE / PAGE 1 / PAGE
2 / PAGE 3 / PAGE
4 / PAGE 5 / PAGE
6 / PAGE 7 / PAGE 8
Home / Articles
/ Gallery / Accessories
/ Builders / Composers
/ Guitarists / Movies
/ Sheet Music / Free
PDFs / Recordings / Teachers
/ Radio / Join
/ Contact Us