|
Jun 15 2005, 01:50 PM
Yeah, I have Middleton's book, and I have reviewed his purfling
installation techniques. In fact, I have tried out his method
of installing the binding, then the purfling on my last two guitars,
and this worked out quite well. But this purfling is a different
matter altogether. The iron is not gonna do any good -- not if
my heating blanked and a caul matched to my mold didn't. I'm
still thinking the easiest way to go will be to remove material
from the inside radii.
Best, Michael
Jun 15 2005, 02:31 PM
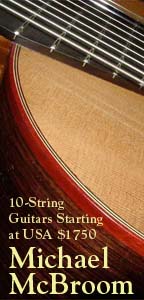
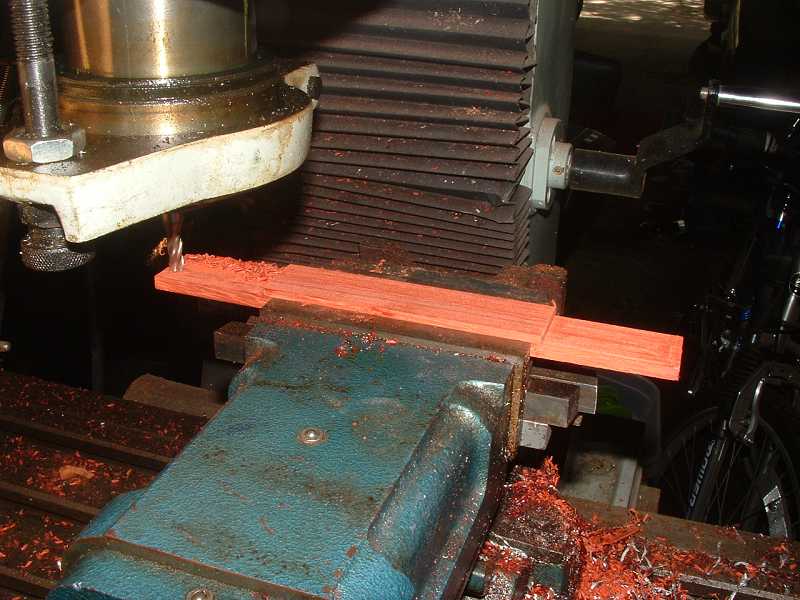
Yesterday, I began working on the bridge. I use my mill to cut
the blank down to its rough outer dimensions, and to cut the
slots. That's a 3/32" bit I'm using in the second picture
to cut the saddle slot and the slot between the tie block and
the saddle block.
Bridge dimensions for 10-string classicals are a matter of builder
preference, it appears. I have seen a few 10-strings with bridges
that are not really any bigger than 6-string bridges. The wings
are just shorter and stubbier. I think the concern among the
builders, such as Hippner, who prefer the shorter bridges, is
that a long bridge may affect the ability of the soundboard to
move freely.
Hey, makes sense to me. But reality doesn't seem to support this
position. The Ramirez bridge, which is the one I used as a basic
template, is 1.5" longer than a standard 6-string bridge,
and that longer bridge sure doesn't seem to have an effect on
the Ramirez 10-string guitars. The one I owned for many years
was quite loud and reasonably well balanced.
Me, I prefer the longer bridge because it is acting as a cross
brace and adds cross-grain stiffness to the top. But I want to
avoid the extra weight, if at all possible.
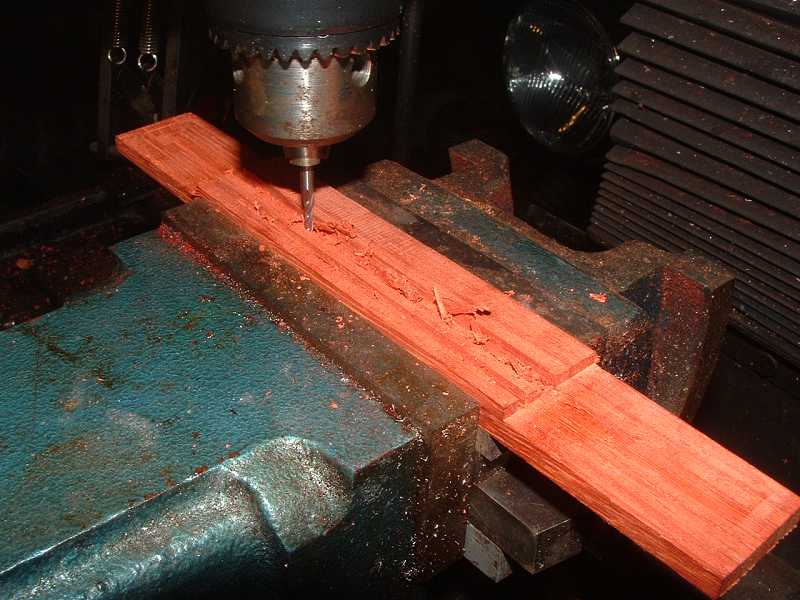
So far, I have built three classicals using padauk as a bridge
material. I like it because it is reasonably hard, but very light.
A typical classical bridge made from EIR usually weighs between
26 and 30 grams. This padauk bridge that I just finished for
guitar 8, even though it is 1.5" longer than a typical classical
bridge, tips the scales at 16.8 grams.
Almost twice as light.
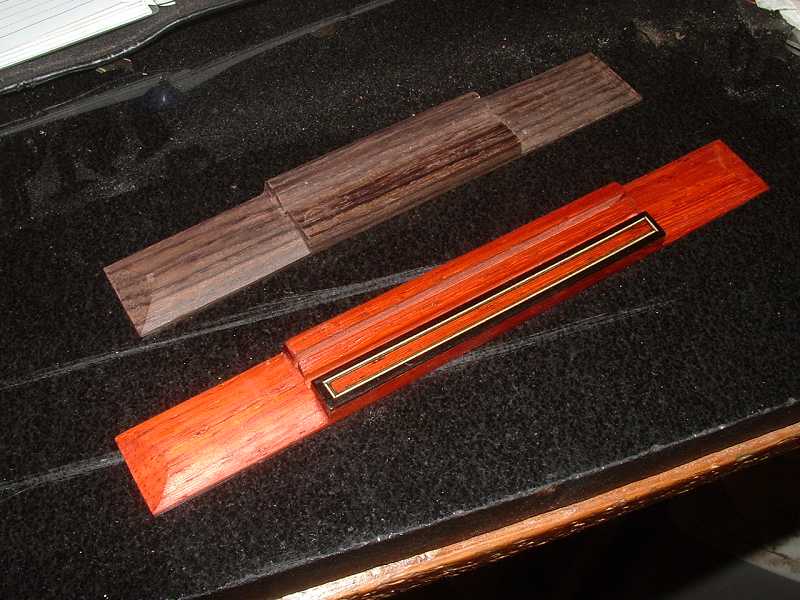
The EIR bridge in the photo weighs 28 grams. The padauk one below
it, not even 17.
For the tie block inlay, I just went with ebony. I like the contrast
between ebony and padauk, anyway.
Welp, the neck still needs a little more attention before I begin
to apply finish for real. I should be able to complete that today.
With a little luck, I can start on the finish tomorrow.
Best, Michael
Jun 15 2005, 10:01 PM
Michael,
I'm enjoying watching this build (soon to be "these builds".)
How well did your countour sanding work out? Was it just a few
thousandths here and there?
I know so little about classical guitar construction (though
I do have Sloan and Cumpiano/Natelson's books) that I was unaware
that anyone used curved braces on classicals. I thought just
about everyone making classicals used "classic" construction.
(Other than the double-top stuff, and the radial brace guy, and...)
The Padauk looks sharp with the Ebony accents on the tie block.
I'm quite surprised that there is that great a difference in
density to EIR, I would not have guessed it.
Gonna need an MP3 when these babies are done, and settled in!
Dennis
Jun 16 2005, 11:21 AM
Hey Dennis,
When you're referring to contour sanding, I take it you're referring
to guitar 9's top?
As for the results of shimming my workboard to contour the top,
I think it worked out pretty well. I have a dial-indicator setup
that I used to check thicknesses after contouring the top, and
they were coming out reasonably close to target thicknesses.
As far as I know, Contreras senior was pretty much the only classical
builder of note who used curved fan braces. You know, Grant bends
his braces for the pattern he uses with his steel-string builds.
I still wonder, though, just how much a classical's sound is
dependent upon its bracing design. Of all the great classical
builders, there are almost as many different bracing patterns,
yet the sound quality differences between the guitars these guys
make or have made are not as great, IMO, as the differences in
the bracing patterns. Not nearly as great.
Best, Michael
Jun 16 2005, 08:49 PM
Michael,
Yes, the contour sanding I was talking about was your innovative
approach to sanding the top.
Your conclusions on variations in top bracing pattern snot having
a remarkable result in sound/tone could be somewhat liberating.
Now maybe you'll feel even more confident to experiment on other
classicals.
Dennis
Jun 16 2005, 09:52 PM
Hehe, Dennis -- truer words haven't been spoken -- for quite
a while, at least. If you investigate my earlier builds here,
you'll note that I'm not a slave to tradition. I do, in fact,
find this large "sweet spot" if you will, to be rather
inviting, when it comes to developing bracing patterns.
I'm actually quite happy with the one that I've installed in
guitar 8. This same pattern is in my 6th build. One of that guitar's
most pleasing characteristics is the sustain that it produces.
Its balance is great and its volume is comparable to that of
more traditionally braced guitars. But the sustain is remarkable.
I'm hopeful that build 8, which uses the same bracing pattern,
will show these same properties. That would be fantastic.
Best, Michael
Jun 17 2005, 06:48 AM
Yes, I have read your earlier builds, (especially your Zen),
and know that you do not fear innovation. I suppose there's just
a chunk of the classical guitar buying public that will always
want tradition, and for them, the more deviation from tradition
they can see from the outside, the lower the chance they would
buy it. But even for that group of buyers, innovations that are
hidden from view, like the bracing, are probably not deterrents.
Of course, whatever you build for yourself, well, the sky's the
limit on innovation. I'm not expecting you to install a whammy
bar or LED's in the fingerboard of a classical, but hope you
keep on with the spirit of the Zen. For example, I could see
you trying a radially braced classical, where the braces are
scalloped and the distance to the peaks follow the Fibonacci
sequence.
Now that I think of it, that classical with a whammy bar sounds
like a great idea!
Dennis
p.s. Sorry to veer off the 10 string road. These builds are plenty
interesting!
Jun 17 2005, 08:12 AM
Hah, My brother has been playing for 40 years and the inside
of a guitar to him amounts to nothing more than a hard place
to get a pick out of.
I kinda like the idea of a classical with strings lit from within
by a complicated fiberoptic network, computer driven to respond
to the sound frequencies, each note having a different color.
Jun 17 2005, 10:42 AM
That's what I did with the steel string I built. Dunno if it
had much of an effect. I've got some other Fibonacci-based patterns
in mind for classicals, however.
Best, Michael
Jun 18 2005, 11:00 PM
Welp, today I finally bit the bullet, sucked it up, and cut the
tuners. The Hauser style tuners by Schaller are the ones I selected
for guitar 8. As it turns out, for the cleanest installation,
there was only one possible way to cut the tuners. My measurements
told me that everything should fit up correctly after
being cut. But the real world has a way of intruding. The way
things wound up, I was left with about a 1/32" gap between
the two pieces. I don't consider this excessive, and I still
consider the way I cut them to be the most secure method of installing
them.
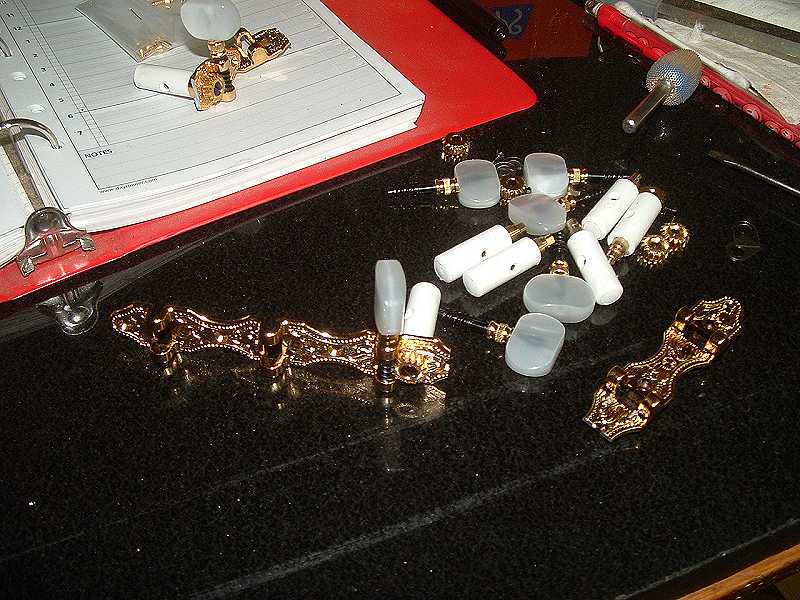
Here's a shot of the tuners still mostly dismantled, after I
cut them on my milling machine.
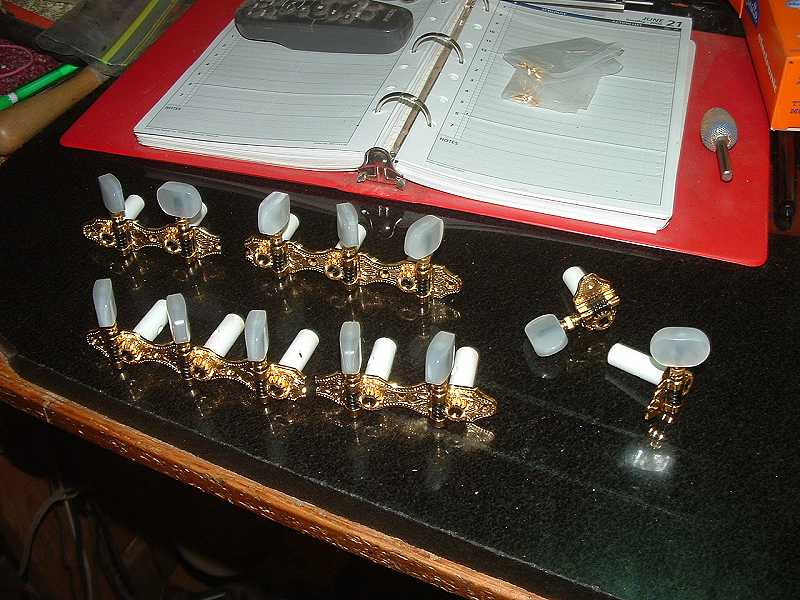
And after I've assembled them. Notice the two "leftover"
tuners. Dunno what I'll do with them. They only have one screw
hole each.
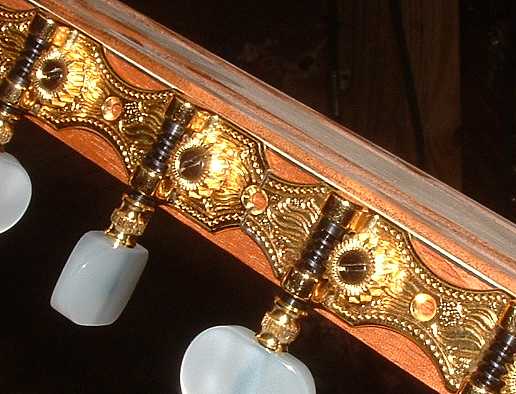
Mounted onto the guitar:

Here's a close-up of the joint, showing the gap I'm talking about.
Now, I could close the gap next time I build a 10-string by closing
the distances between strings 2 and 3 and 8 and 9 by 1/32".
But then, only cut Hauser-style Schaller tuners would fit the
guitar. I'd rather have the slight gap, just in case one might
wish to change out the tuners to a nicer quality set at some
later date.
Jun 18 2005, 11:21 PM
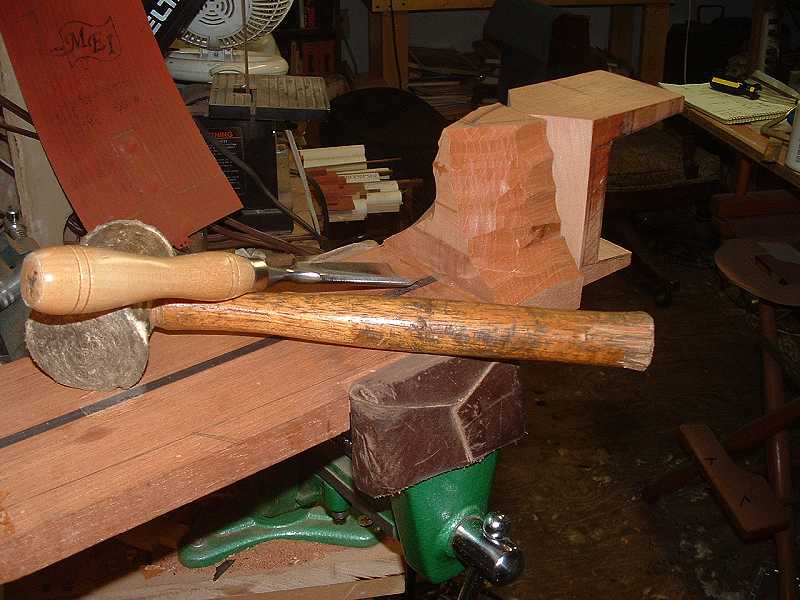
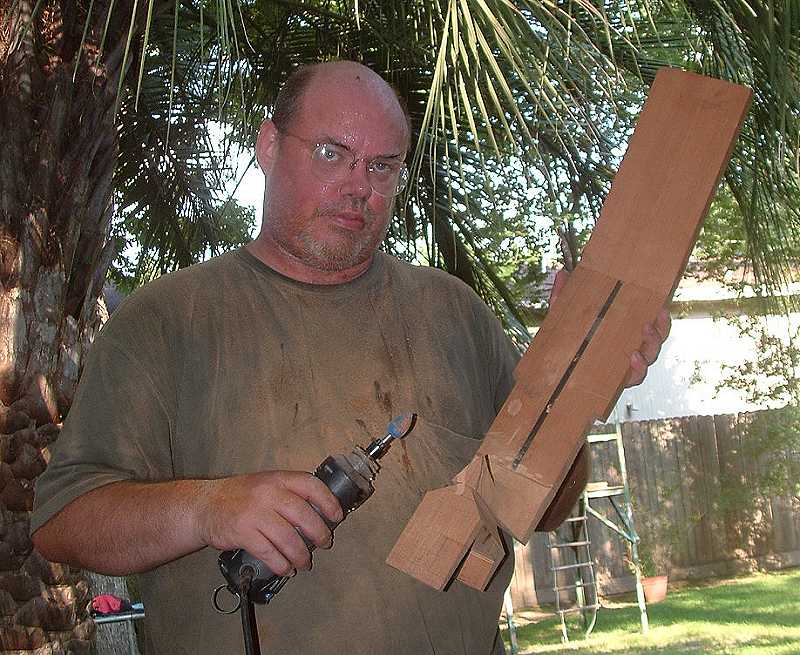
Got a little bit of work done on guitar 9 also. I used my bandsaw
to cut the neck heel's toe and tongue to approximate shape, then
got out the mallet and chisel to hog off some big chunks.
Next, I could have used rasps to bring the heel into the desired
contour, but I didn't feel like messing with them this time,
so I dug out the Big Blue Bit. Chucked it up in my Dremel Advantage,
and got busy.
These bits -- the ones that have the thousands of sharp teeth
-- are super aggressive on wood, and make a ton of dust. Because
of this, whenever I'm working on wood with one of these bits,
I'm doing it outside. Speaking of which, it was 98F outside today.
Hot and sweaty and dusty. Fortunately, it was less than 10 minutes
that I had to spend out in the heat because of the super aggressive
nature of that bit. But still . . .
Back inside my air-conditioned shop, I used a 4-in-hand to rough
the heel into an approximate final contour. Glad I have about
0.2" of extra heel length to deal with. You can see at the
bottom surface of the heel where the bit wiped across it, leaving
a nice divot in the process.
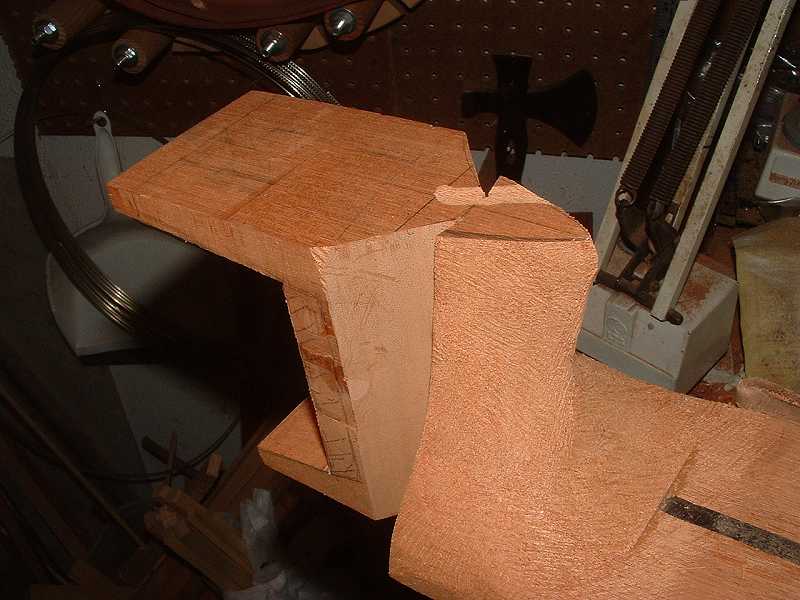
I've roughed out the neck heel enough now where I can turn my
attention to other matters. Next is to glue down the headstock
veneers and headplate, then cut out the headstock, tuner holes
and slots.
Best, Michael
_______
Jun 19 2005, 09:53 AM
M-I can see where the sides are going to go into the block, when
you get to this point could you post how you get them to butt
the outside of the block(heel) so they look nice and tight?
TIA, WB
PS Nice job on those tuners by the way
_______
Jun 19 2005, 12:54 PM
Wilf,
That was a problem I ran into with Guitar 8 -- getting the sides
to butt up flush with the neck heel. Problem has to do with the
angle of the upper bout where a 10-string neck meets the sides.
It's a few degrees greater than where a 6-string neck and sides
meet. I failed to account for this, but in the ensuing residual
neck heel contouring, this gap has all but disappeared.
For number 9, however, I increased the side slot angle by a few
degrees to account for this. I am hopefull this will take care
of the "problem."
Now, as to how I actually clamp things down, here's a photo of
guitar 8 with the clamps in place:
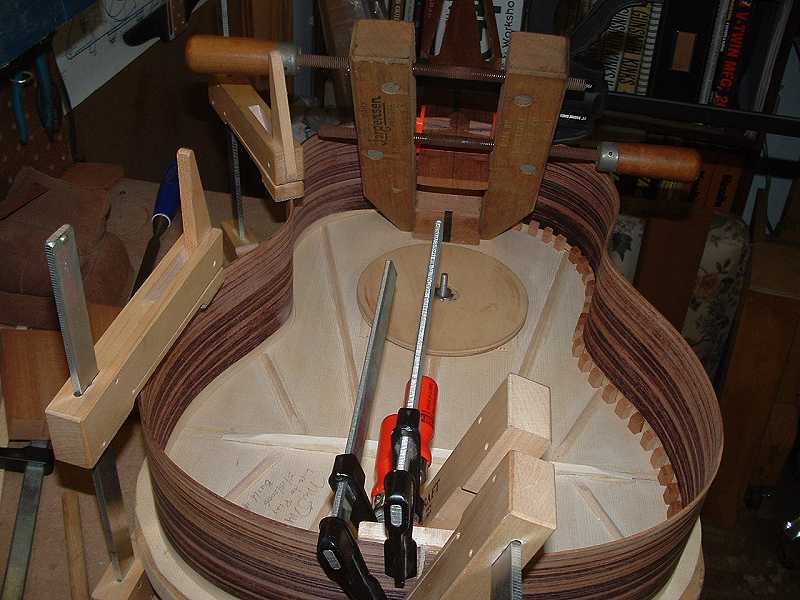
Note the black grip-style clamp situated behind the big Jorgensen
clamp. I have the grip-style clamp applying pressure at the top
of the wedges (in this orientation) and the Jorgensen applying
pressure at the bottom. When the sides are inserted in place,
the wedges stand slightly proud, since the sides are thicker
than the kerf from cutting the wedges. So, I just clamp down
on the outside flats of the wedges and apply pressure. This forces
the sides and heel block to butt up tight with each other --
providing the cut angle is correct, of course
Best, Michael
Jun 20 2005, 11:49 AM
Michael,
Too hot to be outside! This should be fun - not punishment.
The other benefit of the Middleton wedges at the neck is the
clearance for rasp work on the heal. I had not seen that before.
Yesterday our RH finally had been hovering around 50 percent
long enough that I felt good about bracing the tops and backs
of the two I am working on. So far, I do not own a dehumidifier.
I think you got along very well with those tuners. As long as
there are no little burrs to catch a cleaning rag, nobody will
ever look at those joints. Nice job.
Steve
Jun 22 2005, 04:18 PM
Good point, Steve, and one I failed to point out. With the extra
width of the 10-string neck, the extra clearance is nice.
Best, Michael
NEXT PAGE / PAGE 1 / PAGE
2 / PAGE 3 / PAGE
4 / PAGE 5 / PAGE 6 / PAGE
7 / PAGE 8
Home / Articles
/ Gallery / Accessories
/ Builders / Composers
/ Guitarists / Movies
/ Sheet Music / Free
PDFs / Recordings / Teachers
/ Radio / Join
/ Contact Us
|