|
Mar 18 2005, 01:01 AM
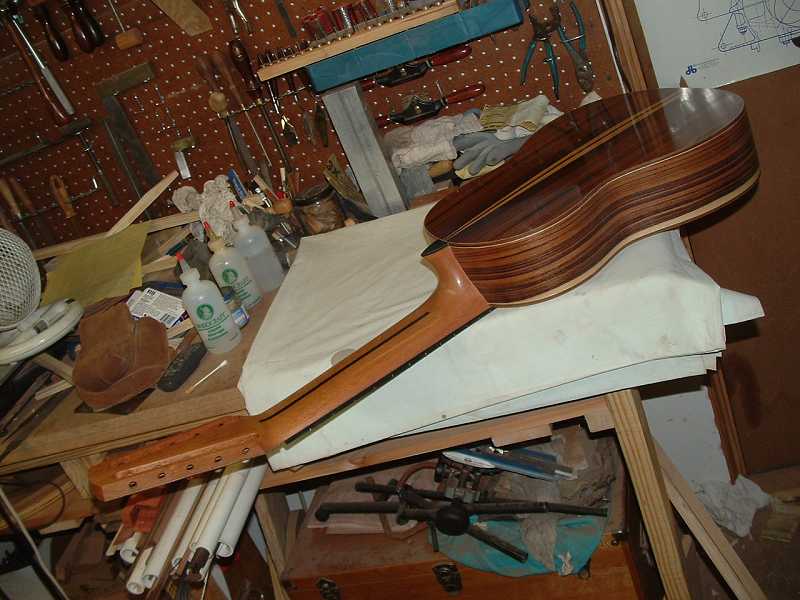
Well, after what seemed to be an almost interminable length
of time spent sanding and filling and french polishing, I finally
declared build #8 done yesterday. This is the way it looks before
attaching the bridge and installing the tuners.
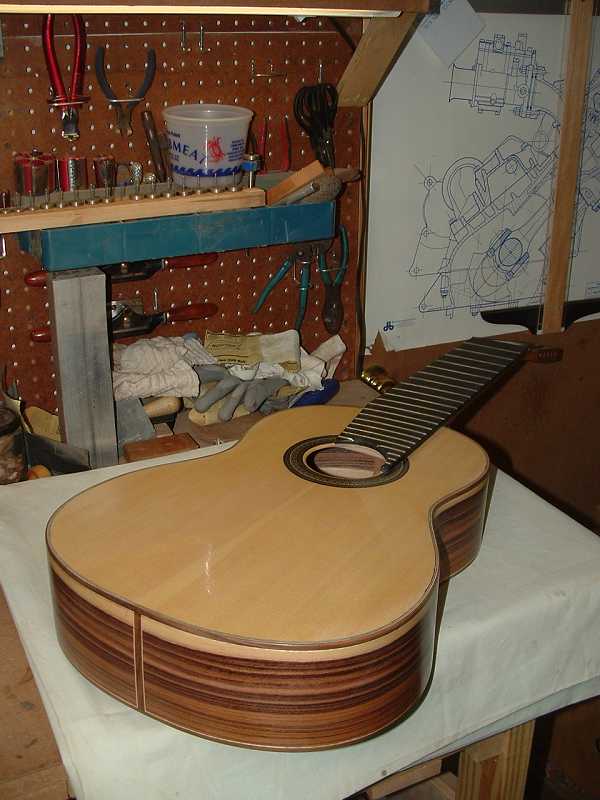
Here it is after the bridge and the tuners are installed. Haven't
cut the nut and saddle yet. I'll wait until the strings come
in.
Just waiting on a set of strings now. Can't go down to the local
guitar shop and say, "Hey, give me a set of baroque tuning
strings for a 10-string guitar." You'll just get funny looks.
So, the set should be here tomorrow or the day after. Can't wait.
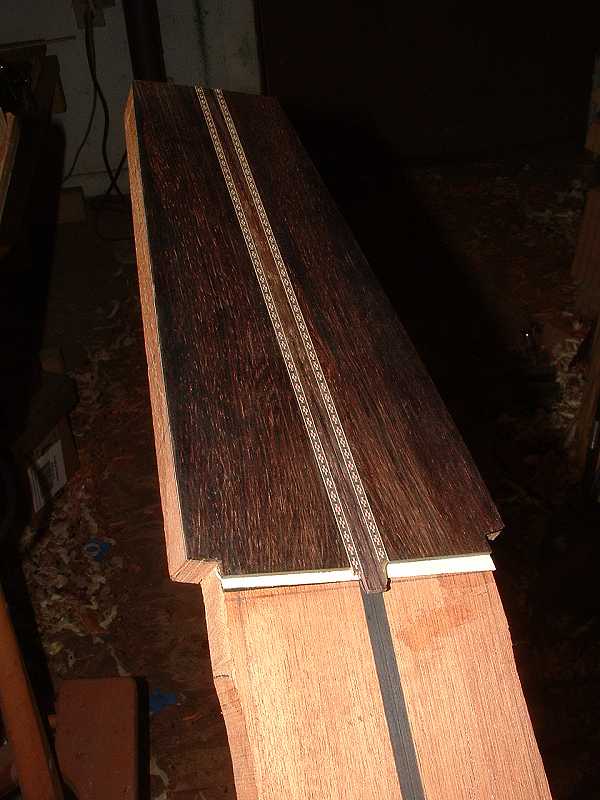
In the mean time, I've been working more on guitar 9. Yesterday,
I thicknessed and glued down the headplate and veneers. This
morning, I began the process of laying out the headstock dimensions
and then cutting out the headstock.
I lay the dimensions out directly on the headplate with a pencil
and rulers. I then cut the 10-string headstock out to its basic
outline, and then plane the edges smooth, making sure that the
edges are exactly perpendicular to the headplate.
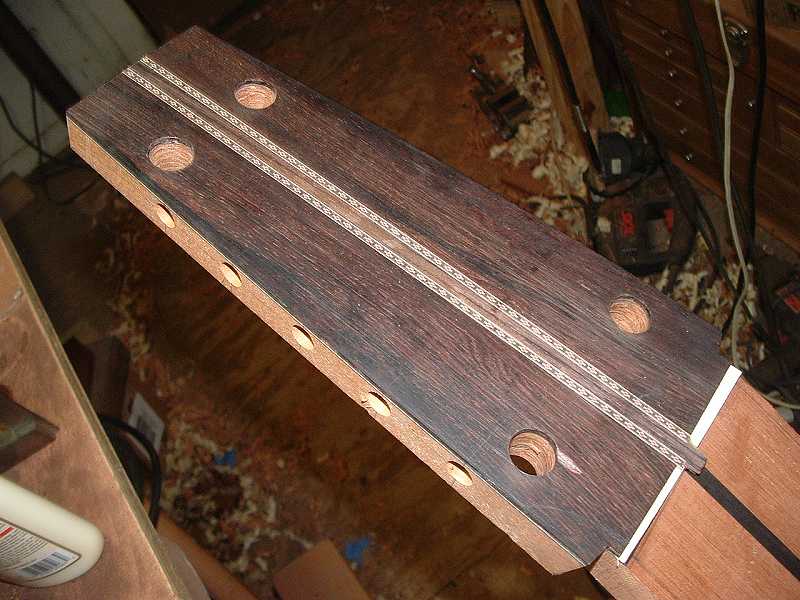
I use my milling machine to bore the tuner holes. It doesn't
take much longer than using a jig, and it's just as accurate,
if not more so. After drilling the tuner holes, I drill the 5/8"
holes that will be the endpoints of the tuner slots. I use a
bit brace for this. So far, the bit has cut cleanly through every
sort of headplate material I've used. This headplate is Brazilian
rosewood. It is a little dry and brittle and chipped out only
along one small edge, which fortunately is where the bevel will
be filed for string clearances.
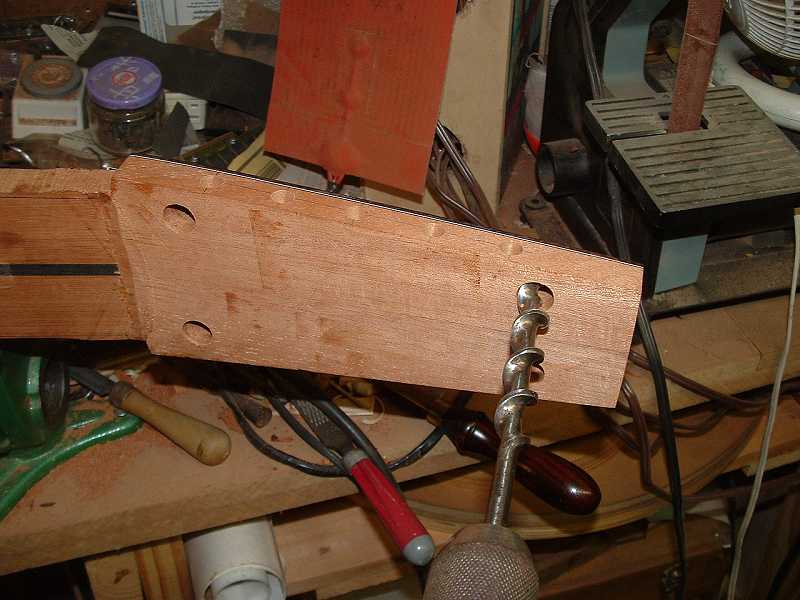
Backing up for a bit -- I drill four pilot holes at the 5/8"
hole centerlines before drilling the holes all the way through
with the bit brace. I do this because I drill the 5/8" holes
out from both sides, to reduce the chance of getting any chip-out
or splintering. Drilling a pilot hole first increases the odds
that the 5/8" holes, when drilled from each face, will meet
in the middle. I start on the headplate face, then flip the neck
over, and . . .
Cumpiano uses a coping saw or something like that to rough cut
the tuner slots. I use a jig saw. It's a lot quicker, and works
just as well. Easy does it, though. I smooth out the slots with
rasps and files
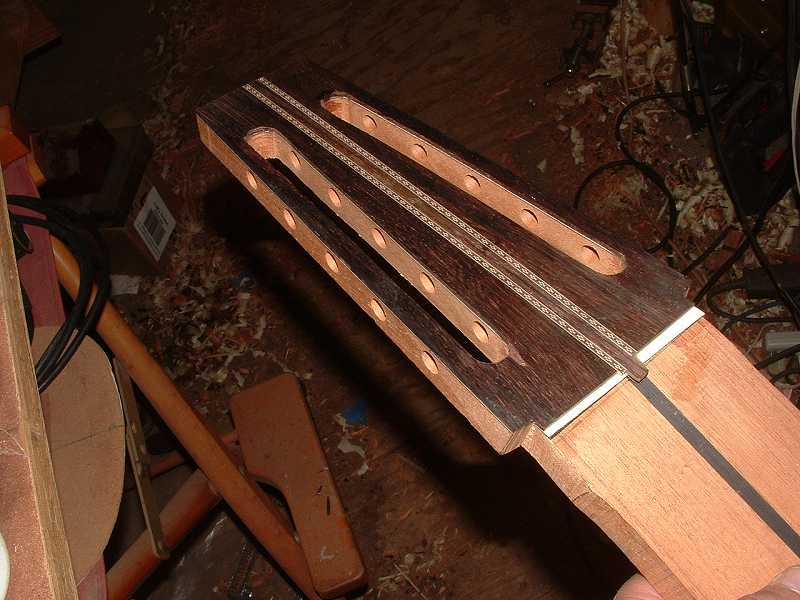
After finishing the slots, I contoured the headstock. Then installed
the tuners for the money shot.
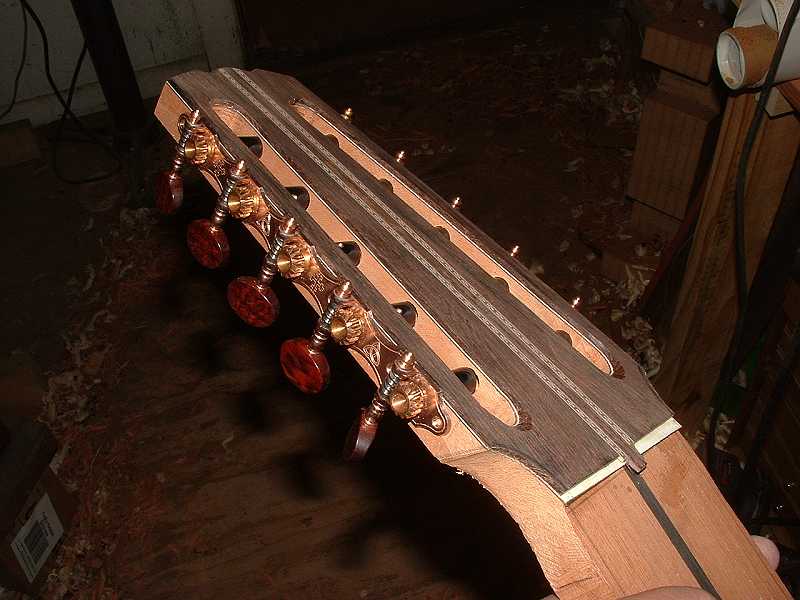
That's it for today.
Best,
Michael
Jun 22 2005, 07:58 PM
Hey Michael,
You are taking to those old hand tools very well indeed. Haven't
known anyone else who used a brace and bit for a long time. BTW
Those bits are fairly easy to keep sharpened. The side spurs
[the ones that define the edges of the hole] are easy to sharpen.
Keeping them sharp really reduces splinters too. Do you have
a full set of bits? I keep mine in a wooden box - just in case.
No fooling, if you hone the cutting edges and keep a little wax
on the metal those bits will work wonders. I have a screw driver
bit for my brace that has proven to be very handy for driving
or removing big screws.
I see you drilled the holes before you cut out the slot. There
was a lesson learned somewhere there. Hope you are very
proud of the #8 10 string. You have done a great job.
Steve
Jun 23 2005, 01:10 AM
Hey Steve,
Yeah, I really like using the "old-school" stuff whenever
I can. I like using a bit brace because I have a lot more control
over the cut, although I guess a Forstner bit chucked up in a
drill press would probably actually work a bit better. Not as
much fun, though.
Yes, I have a relatively complete set of bit braces (inherited
from my grandfather), and yes I almost immediately figured out
how to sharpen the cutting edge of the bit so as to avoid tear
out. In my case, I have a small 1" belt sander that I used
to file down the bit edges. This works pretty well, and probably
prevents tearout.
Best, Michael
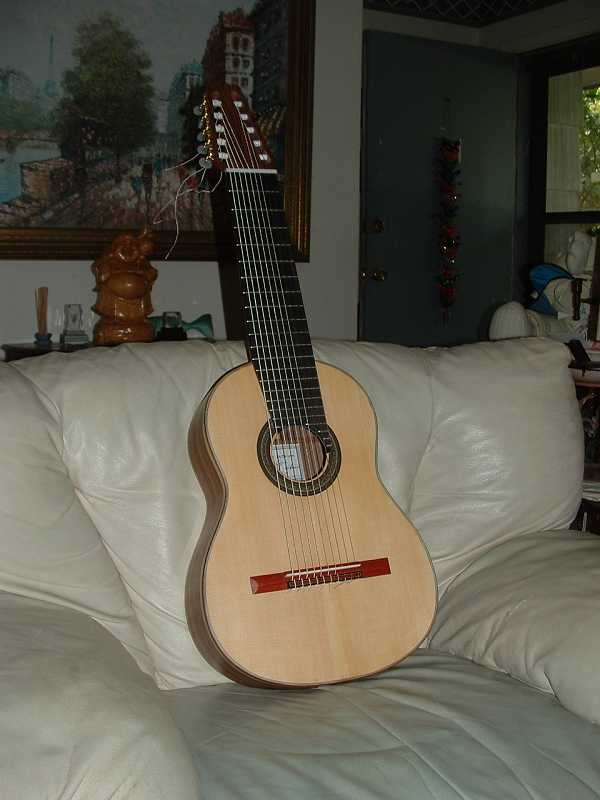
The strings for guitar 8 finally arrived today. I waited
to cut the nut and saddle until I had the strings. It was kinda
important to do it that way to make sure I had enough relief
in the nut grooves -- especially for the fat lower strings. So
after a couple of days waiting, I finally got to string her up
How does it sound? Welp, the short answer is, it sounds like
a 10-string. A 10-string has a different sound than 6-strings,
even when you're playing the lower six strings only and muting
the upper four. More piano like, in a way.
So far so good, though. It has plenty of volume, the highs are
bright and the basses are quite powerful. Perhaps even a little
louder than the basses on my old Ramirez.
I'm pretty pround of this one. It's my best yet. One down, and
one to go.
Best, Michael
Michael
Your skill level has taken a quantum leap from when you built
your first one just over a year ago. Congratulations! A lot of
people give up after their first or second effort. I applaud
your intestinal fortitude. Thanks for sharing your journey.
David
Michael,
Nice job. I agree with David - you have come a long way!
So, what's next.
That used to piss me off at work.
"Nice job on you last project - so - what are you going
to do for us next?"
This is guitar building though so I always kind-of look forward
to the next one. Guess we should have begun building guitars
full time a long ago. Sure beats driving thru traffic to go to
work too.
You should be proud of this one. Maybe you can keep it awhile
and play it ?
Steve
Nice work Michael. I'm impressed!
I wish we could figure out a way to pass these around and play
them, just for 30 minutes or so.
Dean
Guys,
Thanks to all of you for your kind words. I really need to state
that, if it weren't for this forum and the exceptional caliber
of talented luthiers here who freely share their knowledge, getting
to this point as relatively quickly as I have, would simply not
have been possible. Considering that I'm now receiving kudos
from those of you for whom I have great respect makes it all
the more fulfilling.
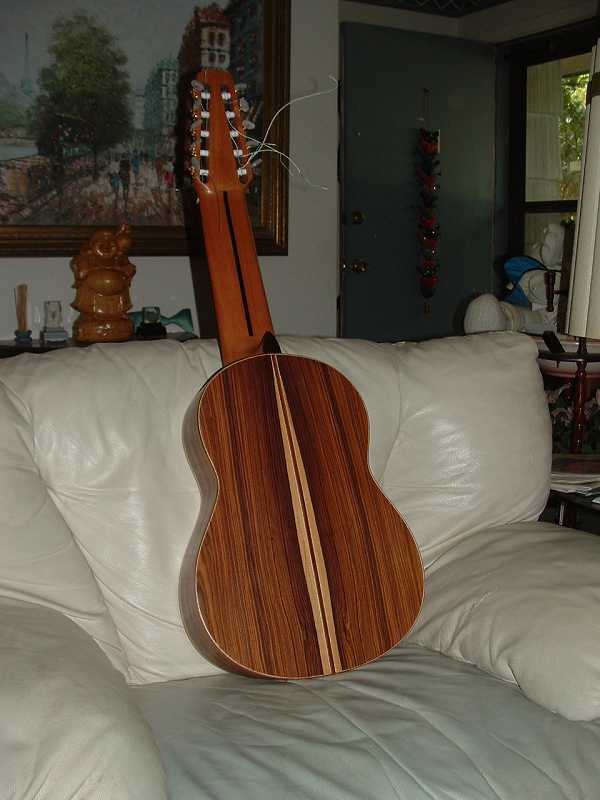
This is the first guitar I've completed that I feel is of a level
of cosmetic quality where I can show it off with some pride.
And I will. But right now I'm really leaning toward keeping this
one so that I will have an outstanding example of what I can
do for future clientelle to evaluate.
Best, Michael
I have to say that's a fine looking 10 string classical . You
have my vote on this one, nice work michael. now that will
make you money.
Ron
Michael,
Well, I'm really glad that you are so pleased with the sound.
You have been so damn honest in showing any wart that might appear
on any of your builds, that I'm convinced that you know this
one sounds great. It's obvious that the craftsmanship is awesome,
and it is great to hear that you are more than satisfied with
the sound.
Well done!
Dennis
Jun 24 2005, 11:40 PM
Dennis,
Thanks for your kind words. One of the things I decided to do
at the outset of documenting my builds here was to show folks
with my experience or less what kind of things can happen and
how one can come up with a workaround. My attitude was, and continues
to be that, if it happens to me, it most likely happens to others.
So, I'm really just trying to add to the knowledge base -- hehe,
warts and all
I have been in way too many similar jams in my life -- many much
worse -- where I've learned from experience that there is always
a way to a solution. The key is to slow down, evaluate, and be
patient. The solution will come. Fortunately, I didn't
hit any major snags with this build so things really went pretty
smoothly.
Best, Michael
Jun 25 2005, 07:06 PM
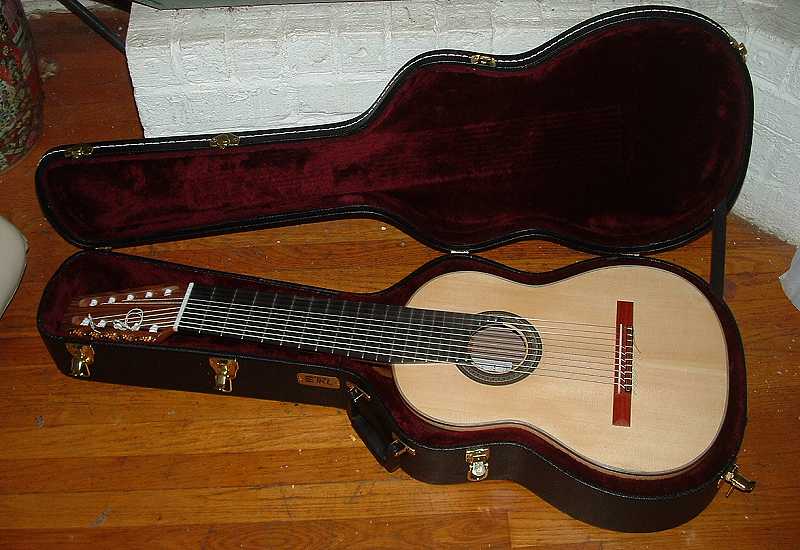
I can't take credit for this tip. Stephen Bright found out that
a 10-string classical will fit in a Martin 00 style case. So,
I hied myself on down to my local guitar shop today, 10-string
in hand, and tried out a few. Sure enough, we found a TKL case
for a 00 that fit my 10-string perfectly.
I know the owner of the shop. He's a classical player and I always
bring my new builds in for him to try out. He got to play the
10-string today, and liked it a LOT. He also gave me a good deal
on the TKL -- $75 out the door.
All I had to do was modify the cradle that supports the neck.
The cradle, as it turns out, is made from styrofoam. I just pulled
back on it to try and get it to separate from the accessory pocket.
It ended up breaking about an inch up from the base. Then I pulled
the plush covering away from it. I sketched out the contour for
the neck that I wanted on this cradle fragment, cut it out on
the bandsaw, then reinstalled it with some tightbond, gluing
it back where it had broken off. I just pushed the plush covering
back over the styro, tucked it back around the edges and snugged
it down. Didn't even need to reglue it, really. It ain't going
nowhere.
Best, Michael
Jun 30 2005, 11:19 PM
Even though I've completed number 8 and it's been strung up for
almost a week now, work on number 9 continues.
I completed the neck heel to the point where it is ready for
sanding, and completed the inside of the neck block/foot/tongue
to its final finished state, since this portion will be inside
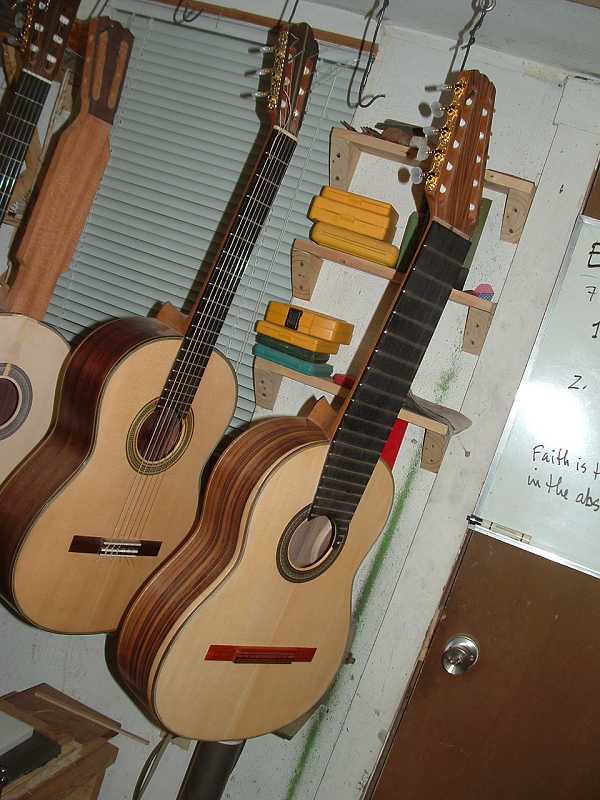
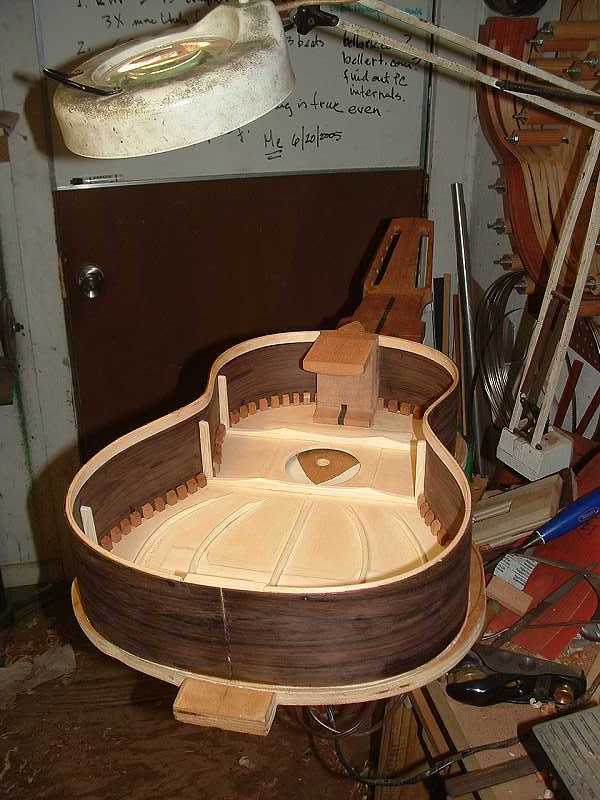
the guitar. Then I glued the neck and tailblock onto the soundboard.
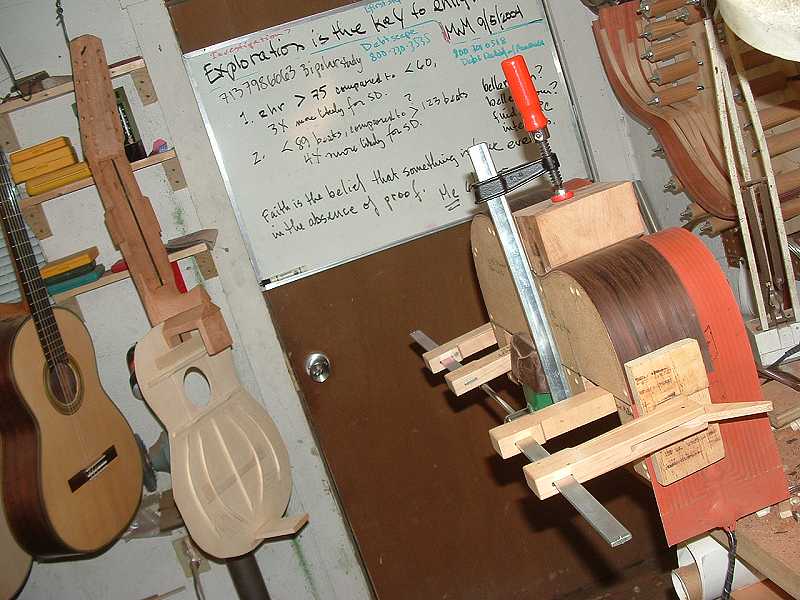
Here the assembly is resting on a hook while I tune up the sides
again. They relaxed a bit since I bent them a couple weeks ago.
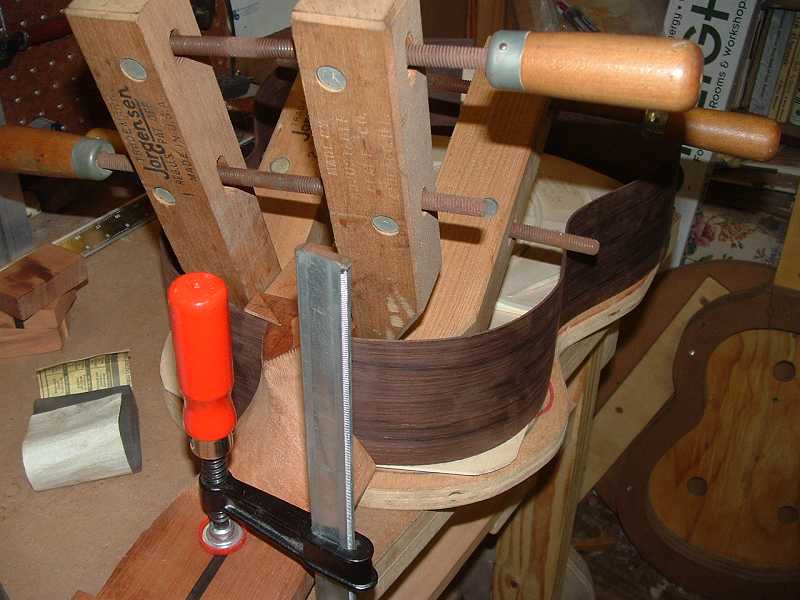
Next I set the sides in place and glued in the wedges to secure
them. Even though Rik Middleton's method is easier than cutting
slots, it is not faster. Reason is, I find I have to glue down
the wedges first before gluing the sides to the soundboard. So,
I have to wait for the glue to dry before I can proceed to the
next step. If one just cuts slots, one sets the sides in place,
wedging them tight with shims if necessary, and immediately glues
them down to the soundboard. I can see the day that, once I've
nailed a consistent way to accurately cut side slots (like when
I can afford a decent table saw), I'll switch back to the old
method.
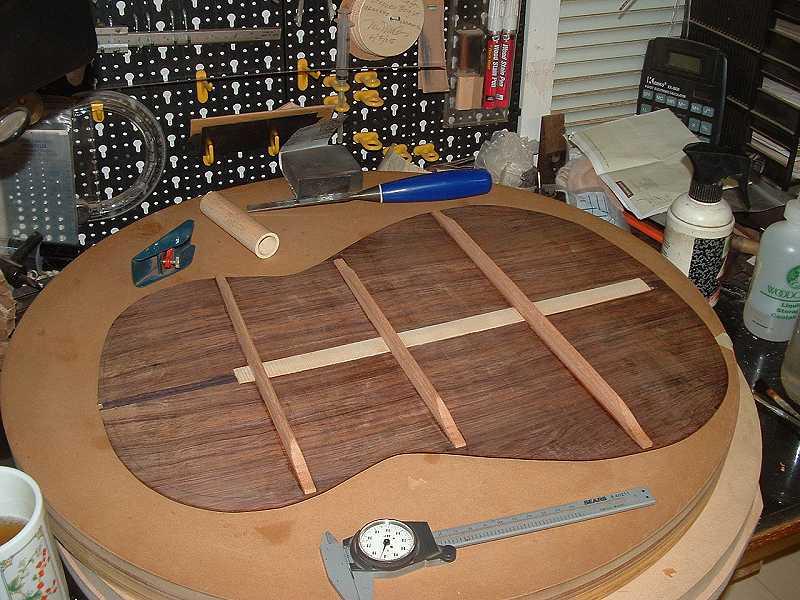
The back is braced up and ready to go.
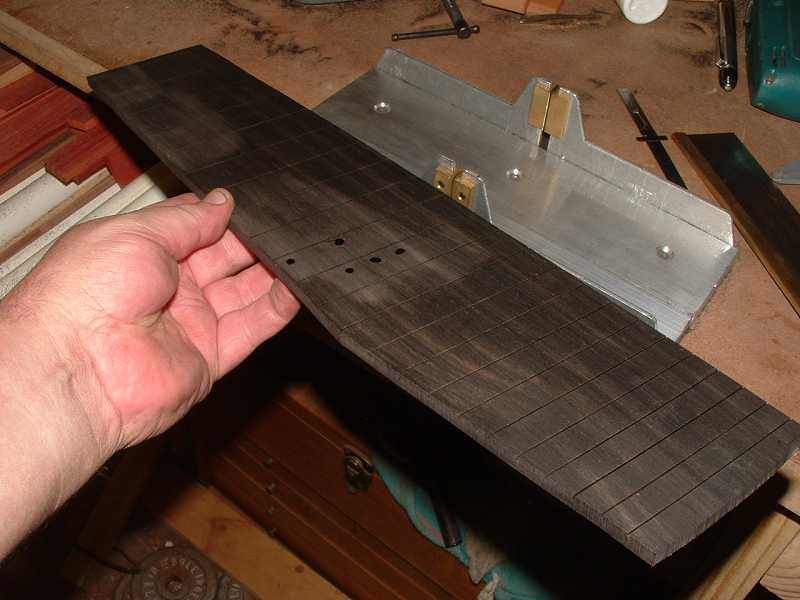
While waiting for the glue to dry in the various steps, I tackled
the fingerboard. This one is wider than the one I used for number
8, so I have a bit more freedom with regards to its final shape
and fit. The spots you see are a few drops of CA I used to fill
some small imperfections.
Finally, I've got the sides, the side braces, and the linings
in place. Tomorrow, I'll cut recesses into the linings for the
back braces, and install the back.
Then the fun starts. Wait till you see the purfling I'm having
to install.
Best, Michael
Jil 1 2005, 12:00 AM
Michael, (I'm being lazy) Did you mention somewhere why you use
solid lining at the rims/back, and kerfed at the rims/top? Also,
what material and dimensions are you using for the solid lining?
Thanks, Dennis
FIRST
PAGE / PAGE 1 / PAGE
2 / PAGE 3 / PAGE
4 / PAGE 5 / PAGE 6 / PAGE
7 / PAGE 8
Home / Articles
/ Gallery / Accessories
/ Builders / Composers
/ Guitarists / Movies
/ Sheet Music / Free
PDFs / Recordings / Teachers
/ Radio / Join
/ Contact Us
|