Mar 13 2005, 02:29 PM
As fate would have it, my first commission is from Stephen
Bright, the fellow who bought my Ramirez 1a 10-string classical.
He loves the 10-string so much, he asked me to build him another.
Well, given the fact that I haven't built one yet, and also that
I sort of miss my old Ramirez, I decided to build two. The first
one will be the guinea pig, as it were. The second will be Stephen's.
I intend to document both builds here.
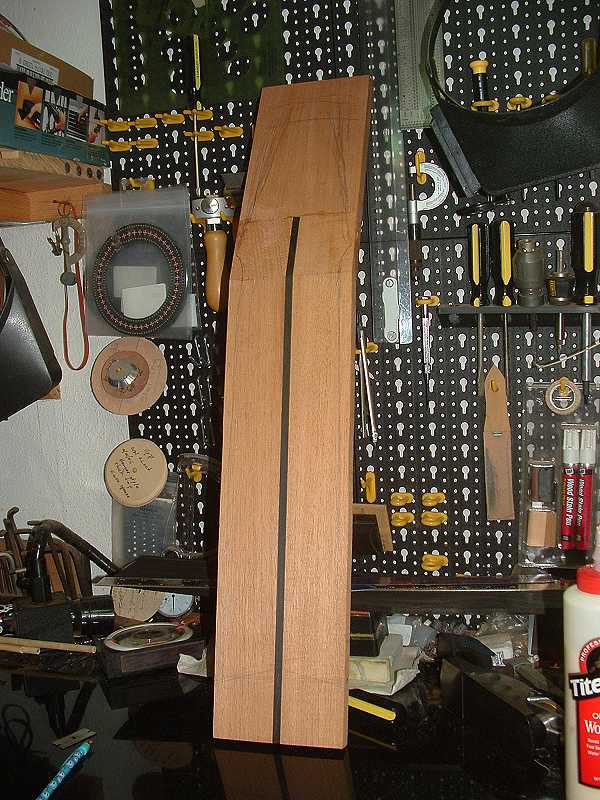
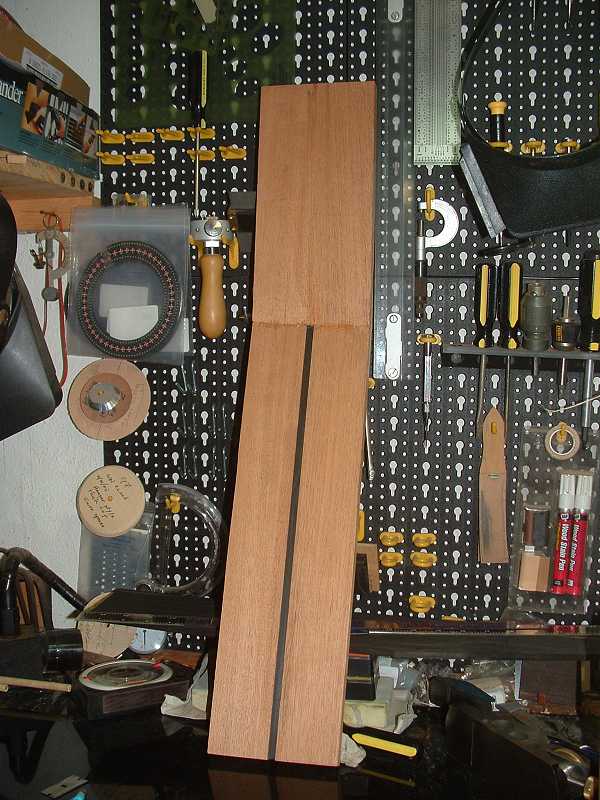
In case you're wondering what on Earth a 10-string is, here
are a couple of shots of my old Ramirez:
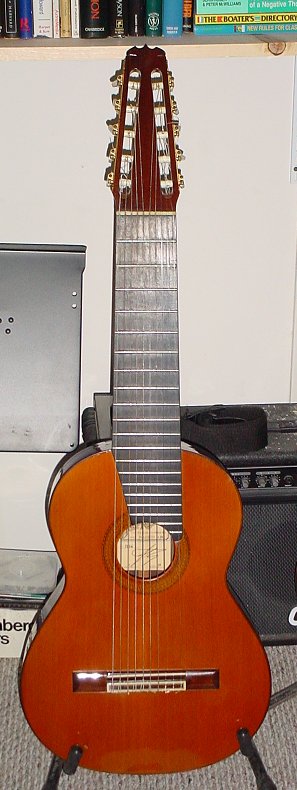
A bit of history -- the 10-string guitar is a result of a
collaborative effort between Narciso Yepes (1927-1997) and Jose
Ramirez III (1922-1995). The first modern 10-string classical
was built by Ramirez in 1964. It has always been somethng of
an obscure instrument, with Yepes having been, by far, its largest
proponent. In more recent years, however, it has been slowly
gaining in popularity, chiefly among players who wish to transcribe
baroque or renaissance lute music to the guitar, where the full
range of bass lines can be preserved. In a similar respect, a
growing number of arrangements of pieces originally written for
piano or harpsichord is also becoming available. Also, players
are becoming more inventive with respect to tunings, which has
fuirther enhanced the repertory.
Actually, except for the neck, fingerboard and bridge, a 10-string
is not substantially different from a 6-string classical. Finding
wood of the correct size can be a bit of a problem, but fortunately
Grant came through with the mahogany and ebony I need for the
necks, and Eddie Yohannes, another member here, was able to supply
me with oversize bridge blanks. Oh, and I can't leave out Mark
(Manitou) for supplying me with a nice piece of corian from which
I'll be able to cut the oversize nuts and bridge saddles. A shame
-- that piece of corian is almost too pretty to cut.
Why Corian? A couple of reasons -- even though it is a type of
synthetic stone, it works easier than bone, and it doesn't stink.
I can cut it with my bandsaw and machine it in my milling machine.
I've used Corian on all my builds so far, and I think it compares
quite favorably with bone in terms of tone and sustain.
As for the woods I will be using, for the first build, I have
selected a nice top set that I cut from a billet I obtained from
Mario. Not sure which tree it is -- I think he called it his
"son of 70203." I have a very nice back and side set
of Bolivian rosewood that I obtained almost a year ago. Great
tap tone. Stephen is supplying his own tonewood for the second
build -- a German spruce top set and a Brazilian rosewood back
and side set.
I've begun work on the 1st guitar already. Joined and thicknessed
the top, installed the rosette and cut the soundhole. Bent sides.
BTW, Bolivian rw is at least as easy to bend as walnut. Easier
to bend than Indian rw. I like it a lot. Glad I'm not allergic
to it
Best, Michael
Mar 13 2005, 04:59 PM
I should add that I've built only one steel string acoustic to
date using corian, and it sounds fine to me. The fact that all
the others use nylon strings may have something to do with it.
Perhaps the difference between the two substances is not as critical
with nylon strings. I guess the best way for me to find out for
sure would be to make nuts and saddles from each material for
the same guitar and A-B them.
As for finding the time -- fortunately -- or unfortunately, as
the case may be -- I have quite a bit of time on my hands, and
lutherie has been an excellent way to keep myself busy. Hopefully
some day soon, it'll start help paying the bills -- or the kid's
college tuition (four years and counting -- *shudder*).
As for playability, welp, that's a whole area of discussion.
The above Ramirez is not a particularly easy guitar to play.
But that is because of its string length, not the additional
strings. Back when I bought that guitar, Ramirez was building
its 1a models with a 664mm (26.1") string length. I have
medium-sized hands, and I found the string length uncomfortable.
But it's all relative, you know? Narciso Yepes, whom I had the
pleasure to meet in 1975, was a tiny guy with small hands, yet
he played a 664mm Ramirez for many years.
Still, I prefer 650mm. Stephen and I have not yet nailed down
the string length for his guitar, although I'm thinking he's
leaning toward 660mm. But he's a big guy with long fingers, so
a longer string length might actually be more comfortable for
him.
It takes a little getting used to, when one first begins playing
a 10-string. Classical technique dictates a "precision grip"
with the left hand, i.e., no hooking the thumb around the neck,
so because of this, neck width is not that big of an issue. The
bigger problem is the unconscious desire to center ones hand
on the fingerboard. When I first acquired my 10-string, it took
a good two-weeks of getting used to before I was comfortable
sighting down that long row of strings, and getting used to planting
my hands down toward the bottom six, rather than in the middle.
For quite a few years, 5-on-a-side classical tuners were simply
not available, so what Ramirez did was to cut sets and butt them
together. Stephen has ordered a set of 5-on-a-side tuners made
by Alessi. I have decided to use the individual Gilberts, a set
of 10 being somewhat cheaper than the Alessis, and certainly
of equivalent quality, if not perhaps a bit better.
Thanks for the heads-up on the Brazilian. I have one set in my
stash, but I've never worked with it. Would you recommend soaking
the sides before bending them? I'm somewhat concerned about getting
chip-out when routing the back for the binding.
Best, Michael
Mar 15 2005, 01:56 PM
I've gotten in the habit of referring to my guitars by build
number. The first of these two 10-strings is number 8, the second
will be, obviously, number 9. Just so's you know what I'm taking
about.
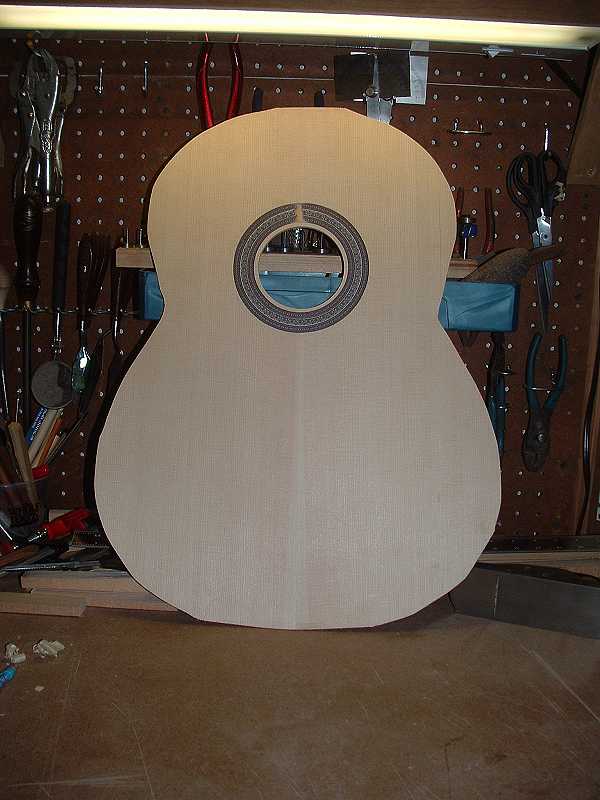
I've been working on number 8's top waiting on my wood order
from Grant. Yesterday I got about as far as I could take it prior
to fitting the neck. Here's what the top looks like so far:
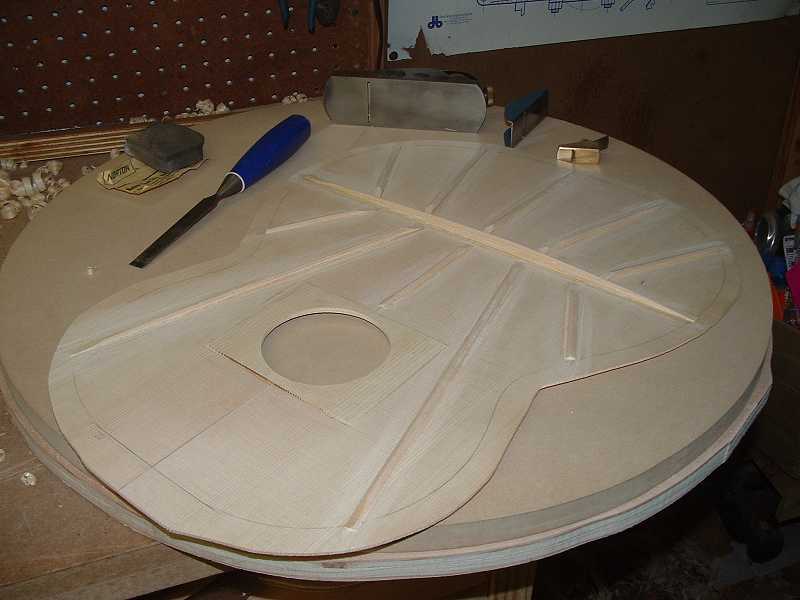
I'll be using flying tone bars, similar to those I installed
on number 6, but they will not be installed until after the sides
are in place.
Incidentally, I'll be working from a set of Contreras plans for
number 9, so its top bracing will be entirely different.
One difference between 10-string and 6-string construction that
I realized right off the bat when laying out the dimensions on
this top is that because of the extra width of the neck, the
12th fret is moved bridgeward about 0.1":
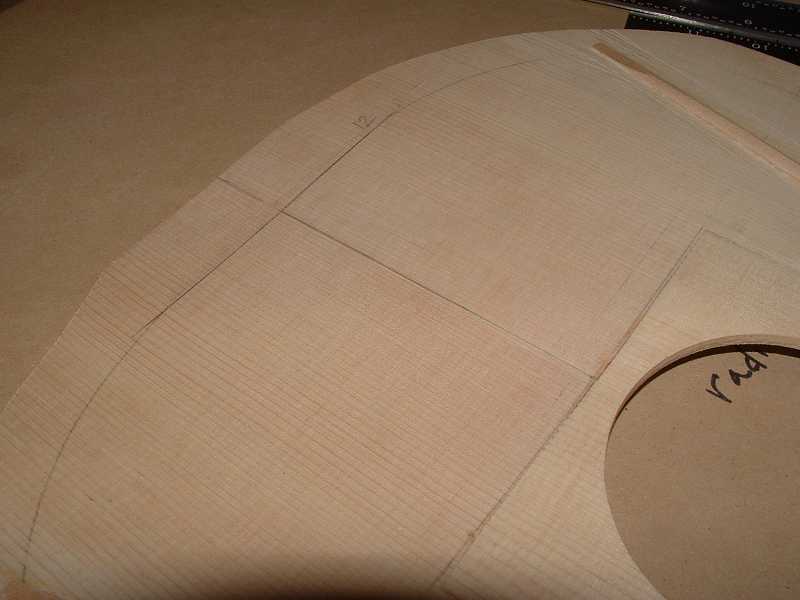
This requires that the saddle line be similarly offset. I
elected not to adjust the position of the soundhole. Normally
this would result in a couple of very small 19th fret remnants
because the 12th fret would be positioned closer to the soundhole
than on a regular 6-string, but because of the extra fingerboard
width, it will actually overlap the edge of the soundhole. So
there should be no detriment. The wood I ordered from Grant arrived
today:

Grant was nice enough even to lay out the fingerboard outlines
on the ebony to insure it was of adequate size. Nice looking
wood, I gotta say. You can see in the above photo what I mean
by the fingerboard overlapping the soundhole, which will give
me the opportunity to run an extension if I choose. Most 10-strings
have at least an extra fret. I'm gonna see if I can add three.
That'll give the player a high D.
Yes, each guitar is going to need three pieces of mahogany. The
piece of ebony off to the left side will be cut into two 20"
strips and each will be laminated between two of the mahogany
blanks. The other two blanks will be used for stacked heels.
I'll have a fair amount of leftover wood from this process, some
of which I plan to use for back bracing.
We have guests arriving from Taiwan later today, so right now
we're getting our tired old house cleaned up. Pretty soon, it'll
be time for me to drive out to the airport, so I doubt I'll be
getting to do much of anything with this great looking wood until
tomorrow at the earliest.
Stay tuned. Best, Michael
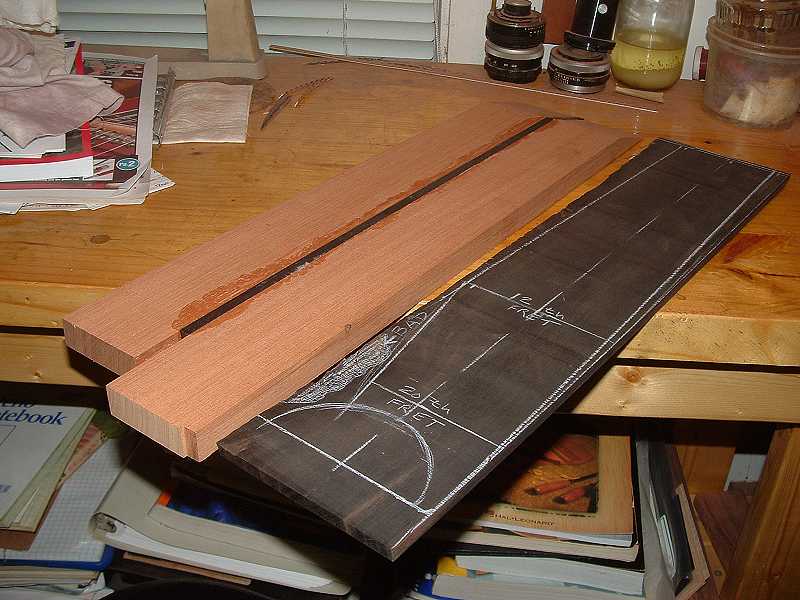
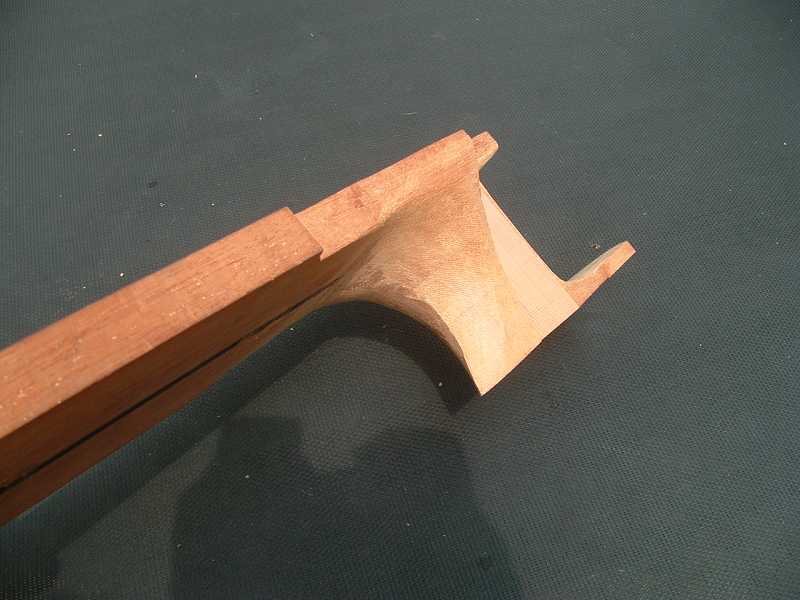
Mar 17 2005, 01:08 AM
Today I began the most challenging part of a 10-string build
-- fabricating the neck. I have lain in bed at night thinking
through how I would proceed with the neck for weeks, and have
largely worked out in my head how I wanted to do it.
I suspect that the way I'm building these necks is different
from the way most other classical builders who add center reinforcing
strips do it. I'm guessing that Ramirez and others route a channel
for it in the neck blank, not unlike the way one would route
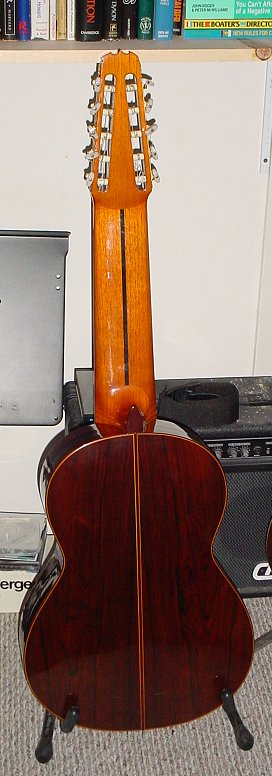
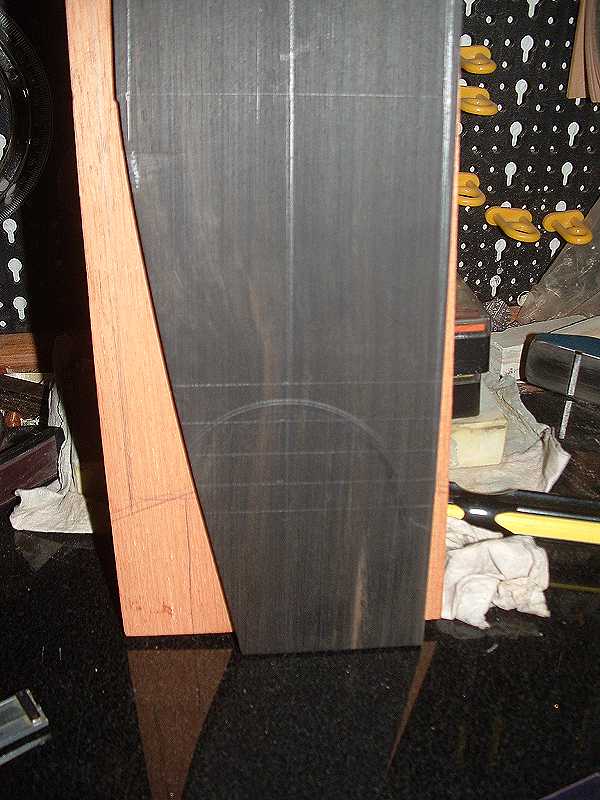
a channel for a truss rod. But if you look at the above photo
of my old Ramirez, you'll note that the reinforcement strip is
covered by the headstock's scarf joing and the heel block, which
means that the strip was inlaid after cutting the scarf, but
before gluing up the headstock and the heel.
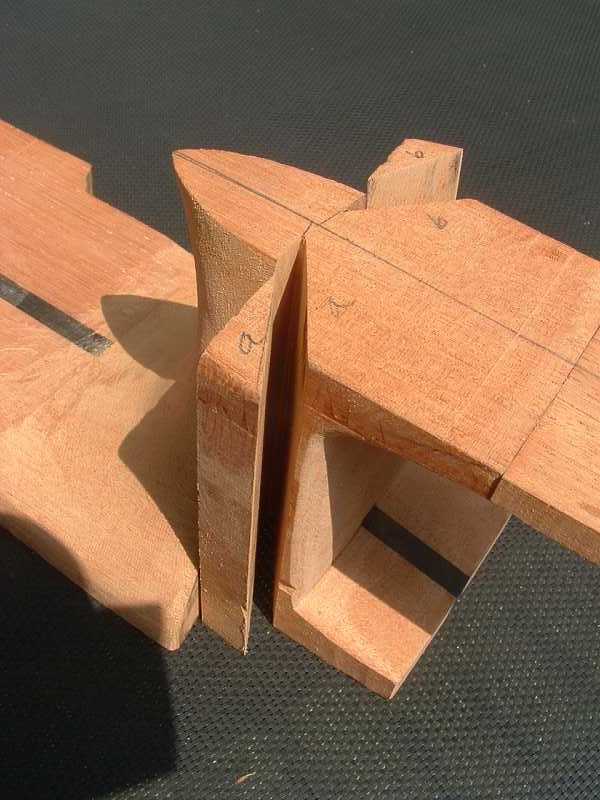
Well, I'm not doing that. These guitars will have three-piece
laminated necks. I wanted the ebony strip to butt up against
the underside of the fingerboard, forming a "T" for
max ridigity, but I did not want to carry the lamination through
the headstock and the heel -- I wanted to preserve the more traditional
look as much as possible. This complicated things. My early estimates
are that, in order to do the neck the way I want it, this will
add at least an entire day's work to the build time.
OK, first things first. I decided to cut out the ebony strip
to its approximate dimensions and thickness it to about 0.280".
Next, I squared up and thicknessed the two neck blank pieces.
They required a bit of final touching up with the plane to make
a nice even fit with the center strip:
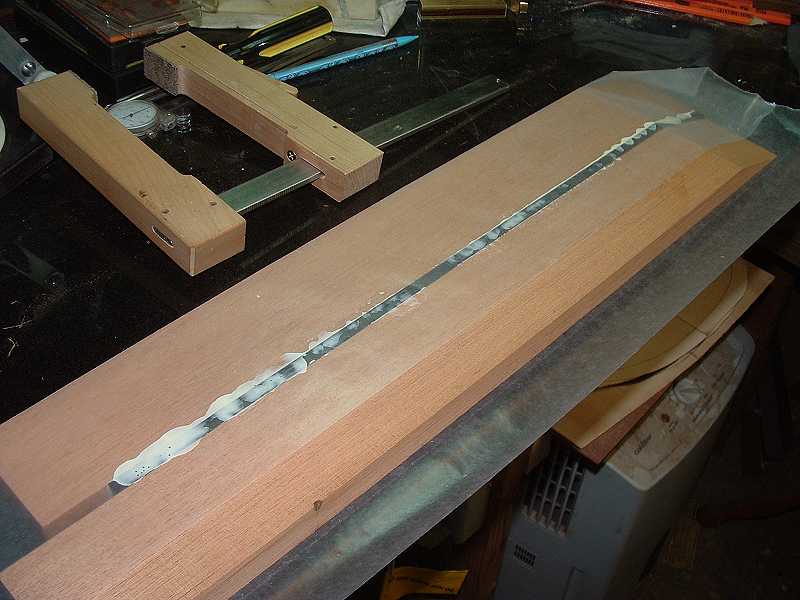
Then I cut the scarf for each neck blank half and planed each
half with its half of a headstock the way one normally would.
It occurred to me after doing this that this is a wasted step.
The scarf joint must be planed true again after gluing together
the laminates and before gluing the headstock and shaft together.
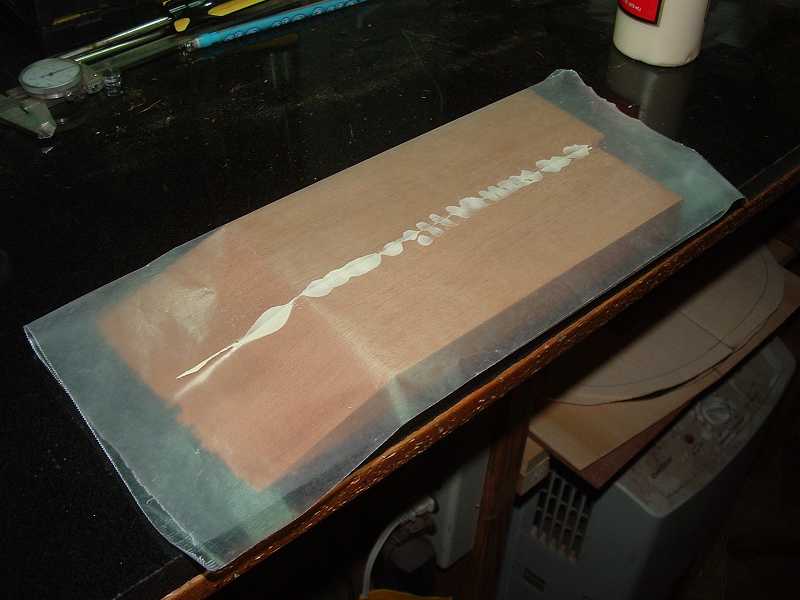
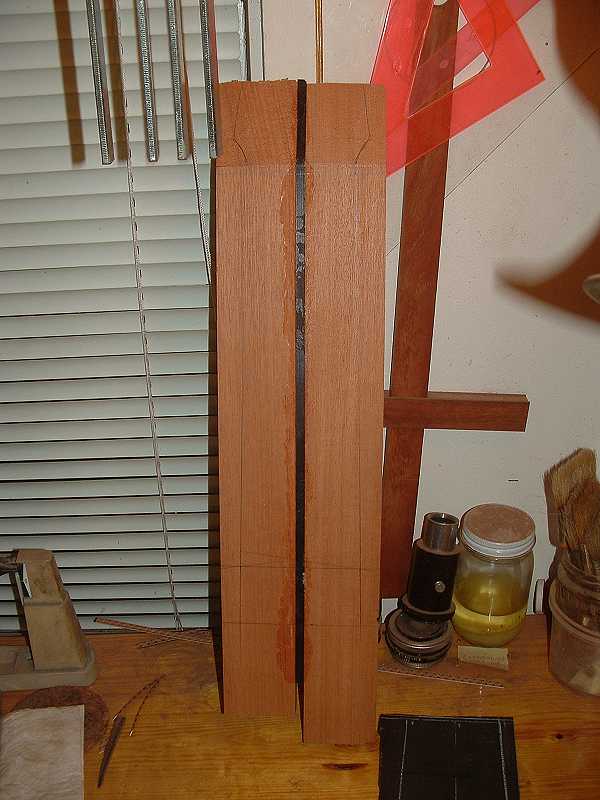
Next, I trimmed the same 15 degree angle into the ebony center
strip. Here are the three pieces mated up dry:
Laid out some wax paper, applied the glue, and covered with
wax paper:
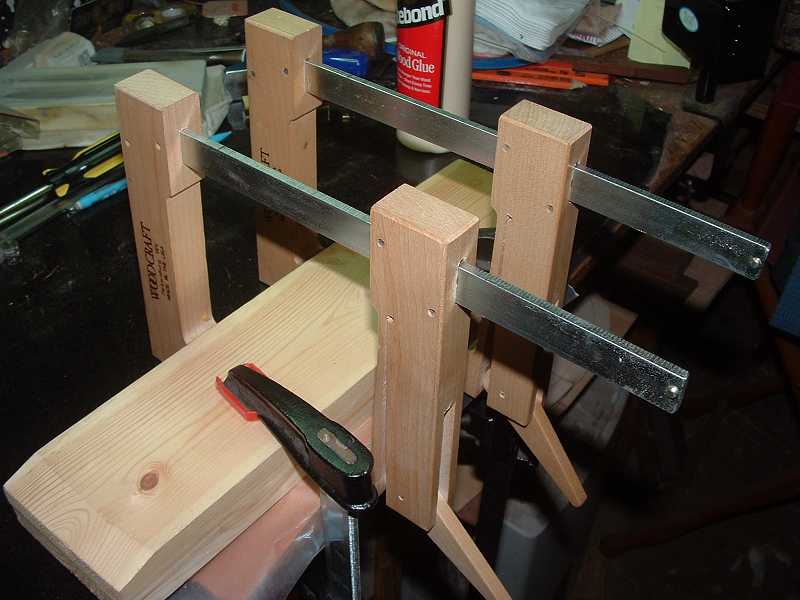
Clamped it all down good using one of the neck blank pieces
as a caul:
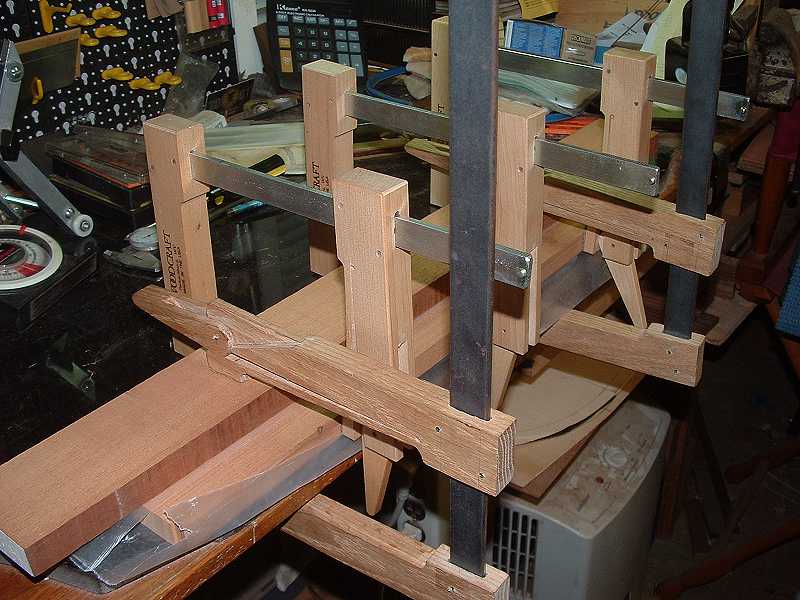
Did the same with the headstock section:
Here's the glued up neck shaft with the fingerboard alongside:
And another look at the blank with the neck's actual dimensions
penciled in. As you can see, there will be a fair amount of offcut
material.:
So far, so good. Tomorrow, final smoothing and fitting of
the scarf, then glue-up.
Best, Michael
Mar 18 2005, 01:01 AM
Today, I trimmed the edges of the neck blank down to the same
width as the headstock by running it through my bandsaw and then
doing the final contour with a block plane. This made it easier
to clamp up the two pieces so I could plane the scarf joint before
gluing. You guys who have your table saws set up for this procedure
are miles ahead of me in the ease department. I'm having to fit
all this by hand. I don't trust my funky old benchtop table saw
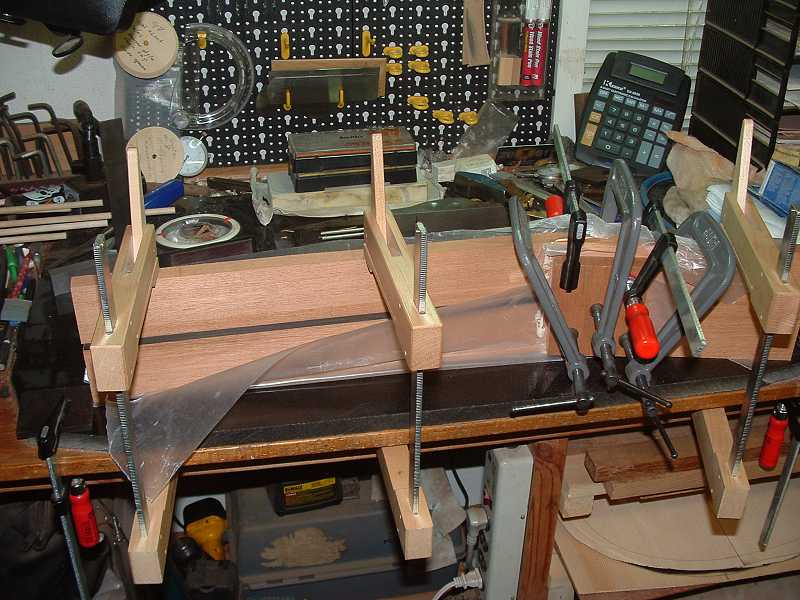
to do this well enough for lutherie.
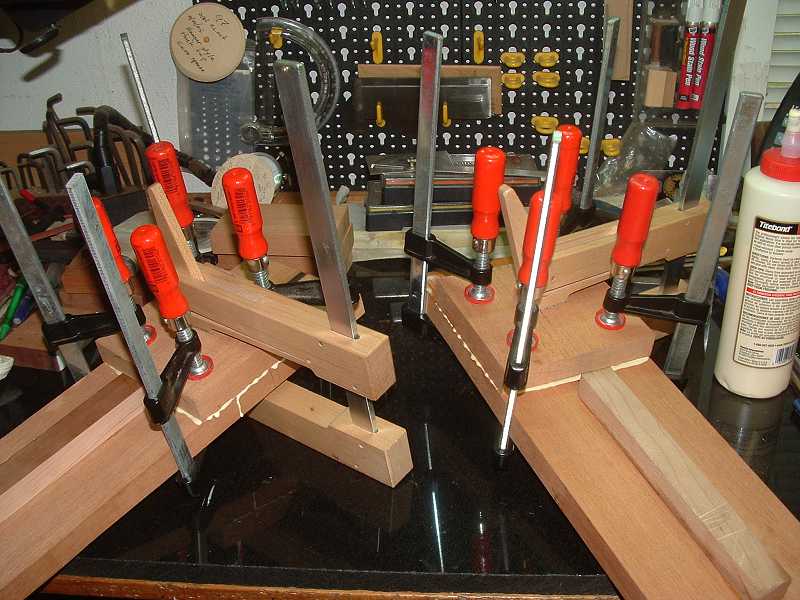
Gluing up the scarf joint is really no different from gluing
it up with any other build, just everything is a bit wider. I
always use five clamps at the joint, one for each corner and
another for the middle.
Another aspect of the 10-string neck that must be taken under
consideration when laying out the dimensions before cutting wood
is the extra length of the headstock that is required to support
five-on-a-side classical tuners. The standard center-to-center
distance between tuners is 35mm or 1.378". A 10-string has
two additional tuners per side, so the headstock must be at least
70mm or 2.756" longer to accomodate them. I follow Cumpiano's
book when it comes to sizing the headstock -- 8" in length.
So to keep things simple, I just added 3" to the length
of the headstock before cutting the scarf joint.
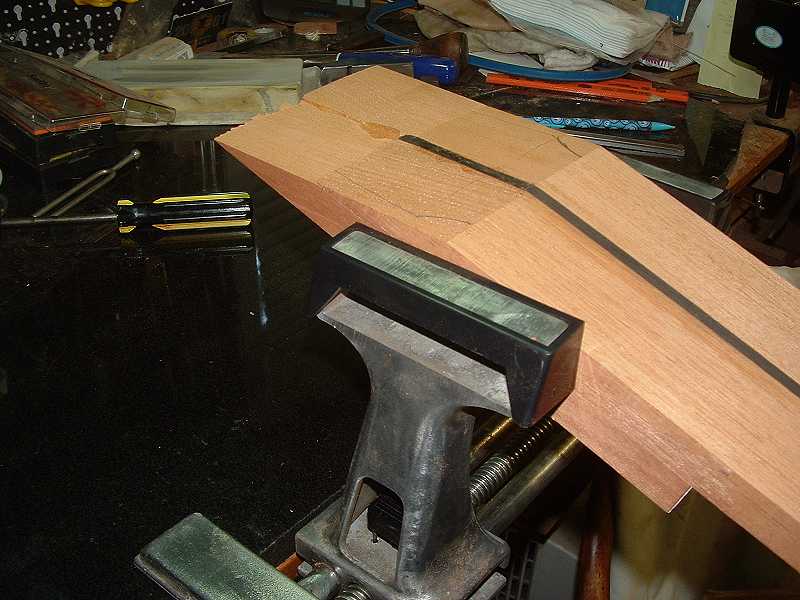
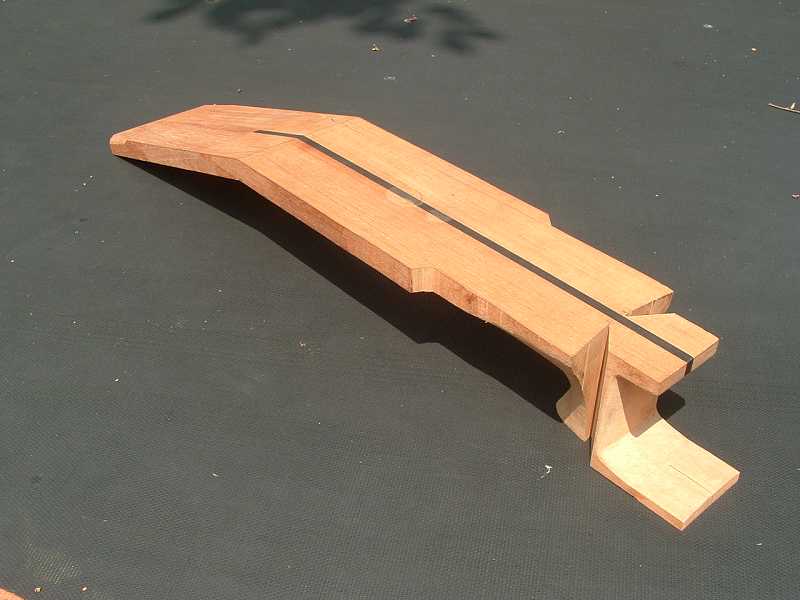
Here is the neck shaft after glue up. You should be able to
see a roughly penciled in outline of the headstock.
Here is a rear view look at the neck shaft. I've duplicated
the "look" of the center reinforcing strip as used
by Ramirez, Kohno, Navarro and others, by covering it with the
headstock section, yet my construction will be stronger since
the ebony strip runs all the way through the neck shaft. (edited)
After cutting the fingerboard to its rough contours, I began
to mark out its outlines with a bit more precision. It looks
like I might just barely be able to squeeze in 22 frets. The
horizontal lines drawn onto the fingerboard represent the 18th
through 22nd frets.
Tomorrow, I begin to assemble the pieces for the stacked heel.
That should be another adventure
Best, Michael
Mar 18 2005, 05:46 AM
Michael,
Wow, this is quite a project. Almost as crazy as a harp guitar!
Not being familiar with classical guitar construction, I didn't
quite understand your statement, "Here is a rear view look
at the neck shaft. I've duplicated the "look" of the
center reinforcing strip as used by Ramirez, Kohno, Navarro and
others, by covering it with the headstock section, yet my construction
will be stronger since the ebony strip runs all the way through
the fingerboard." Could you elaborate?
David
Mar 18 2005, 10:35 AM
Hi David,
Ah, I think I now understand your question -- after I wrote all
the stuff below I should have written "neck shaft"
instead of "fingerboard." That is, I should have stated,
"I've duplicated the "look" of the center reinforcing
strip as used by Ramirez, Kohno, Navarro and others, by covering
it with the headstock section, yet my construction will be stronger
since the ebony strip runs all the way through the neck shaft."
Think I'll go edit that post so nobody else gets confused.
Just in case this wasn't what confused you, I'm leaving in this
note the stuff I typed already:
Yeah what I meant by that is I'm pretty sure -- not absolutely
positive -- that Ramirez, Kohno, Navarro and others cut a channel
in the back side of the neck shaft for an ebony reinforcement
strip. Not just in 10-strings, but in all their guitars. I dunno
how deep their reinforcement strips are, but I don't think they
do the laminations that I've done -- they just cut a channel
and inlay the strip. I say this because the grain in the neck
shaft appears to indicate that it is a single piece of wood.
So, if this is indeed the case, the process is 1) cut the scarf,
2) route the neck shaft for the inlay strip, 3) level the strip
flush to the shaft, and 4) glue down the headstock and heel.
The result is the way the back of the Ramirez neck looks in the
photos I show at the beginning of this thread, where the strip
is covered by the headstock and heel.
I wanted to duplicate this appearance -- that is, I didn't want
the ebony strip running up the backside of the headstock and
through the heel. It would have been much easier just to laminate
a strip of ebony down the whole blank before cutting the scarf,
but then I would have had the strip showing at the back of the
headstock.
Best, Michael
Apr 1 2005, 09:08 AM
WB,
I'm not planning to change the bracing at all. The large fingerboard,
and a larger "foot" section of the neck heel block,
plus the longer bridge, seems to provide more than enough additional
stiffness for the extra four strings.
My apologies for not posting any recent updates on this project.
Been really busy with other matters this past couple of weeks.
I've made some progress, though. Glued down the heel blocks for
both guitars, and roughed in the heel shape on #8. Pics to follow
soon.
Best, Michael
Apr 21 2005, 03:59 PM
Welp, things have finally started to settle down over
here. Life is still kinda hectic, but at least I've been able
to make some headway on the 10-strings. So, it's time to bring
y'all up to date.
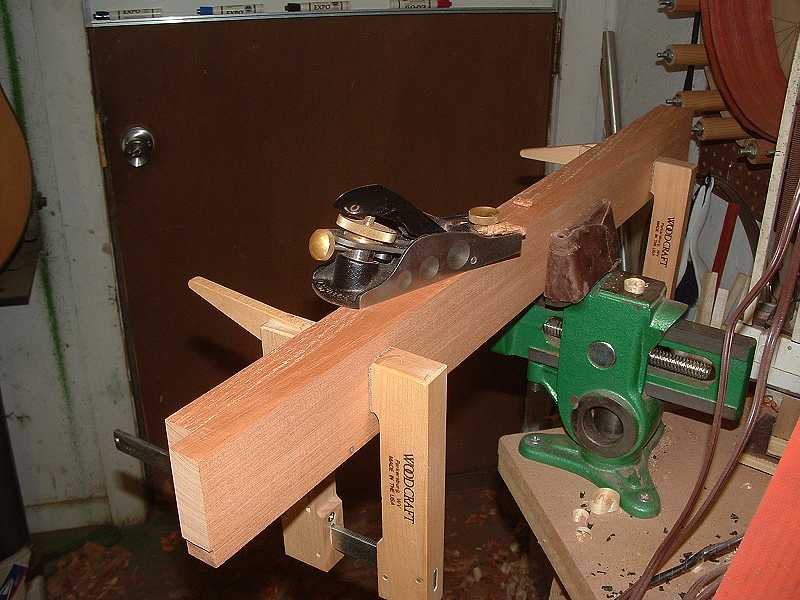
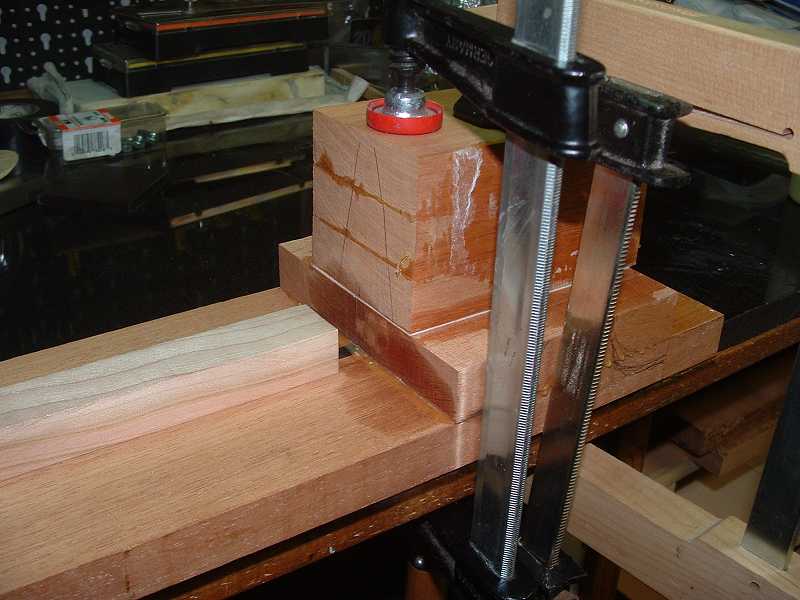
These extra wide necks have given me more troubles than I originally
thought they would. Most of this is due to the fact that I have
only one vise that is big enough to hold a 6" width, and
it isn't a very good one. So I got the idea to lightly glue on
a couple of sacrificial pieces of hardwood to the top and bottom
sides of the neck shaft, because I could clamp the vise on them
rather than the entire width of the shaft. Here's a photo I took
while gluing a piece on:
This worked -- sort of. Couple of times, the wood broke loose
at the joints. The glue didn't fail, though -- the wood did.
Too small of a cross-sectional area for the forces I was applying
(chiseling the neck heel).
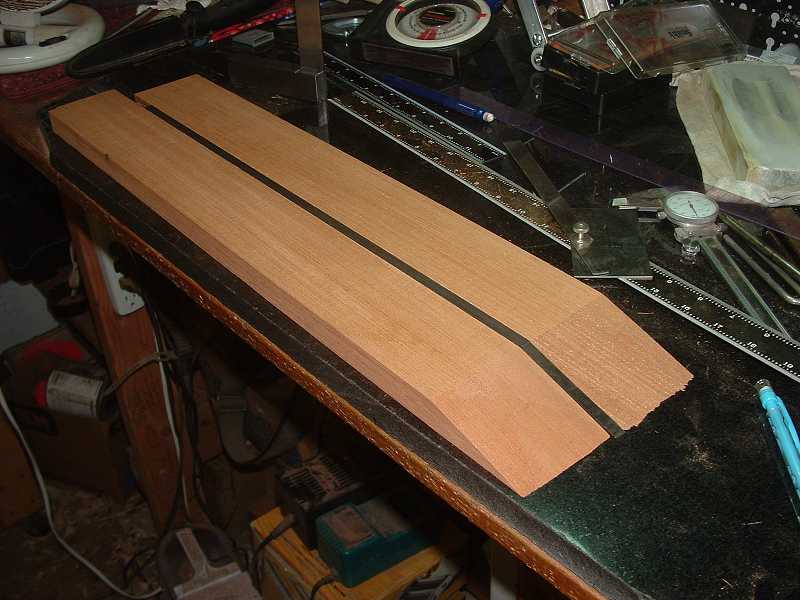
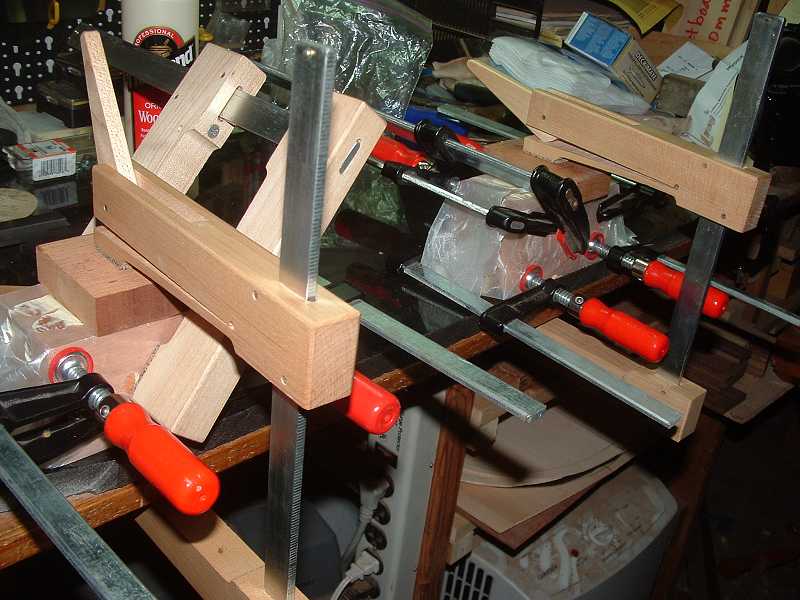
Cumpiano shows very clearly how to do a stacked heel, and this
is the way I prefer to do it. But with the 10-strings, I had
to modify the process. Here's a shot of the neck shaft with the
heel pieces fitted up dry. The two pieces laying against the
neck shaft were already glued together separately before I took
this photo.
I glued the two doubled up pieces to the shaft first, and
then glued the remainder of the heel pieces together, then finally
glued everything together
I didn't have a 10-string handy to refer to, and noted only
after the fact that I should have offset the bottom piece by
about 2" toward the soundhole. Reason is that most 10-strings
have larger "feet" than traditional classicals. So,
to make up for this, I had to go and glue on an extention. The
glue line will show, just barely, and it should be plenty strong
enough.
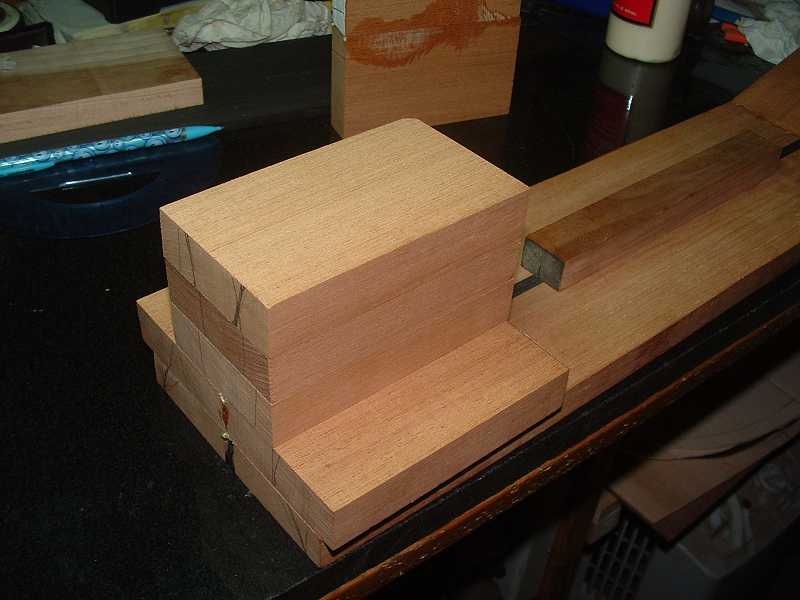
Here's a shot of guitar 8's heel after I've roughed in the shape.
It still needs a fair amount of material removed yet, but I'm
getting close.
And a shot of the wedge technique I picked up from Rik Middleton.
I like cutting wedges way better than cutting side slots. So
much easier.
This is the way guitar 8's neck looks right now. Next step
is to glue down the headstock veneers and headplate, then drill
the tuner holes and cut the slots. After all that I can begin
contouring the neck.
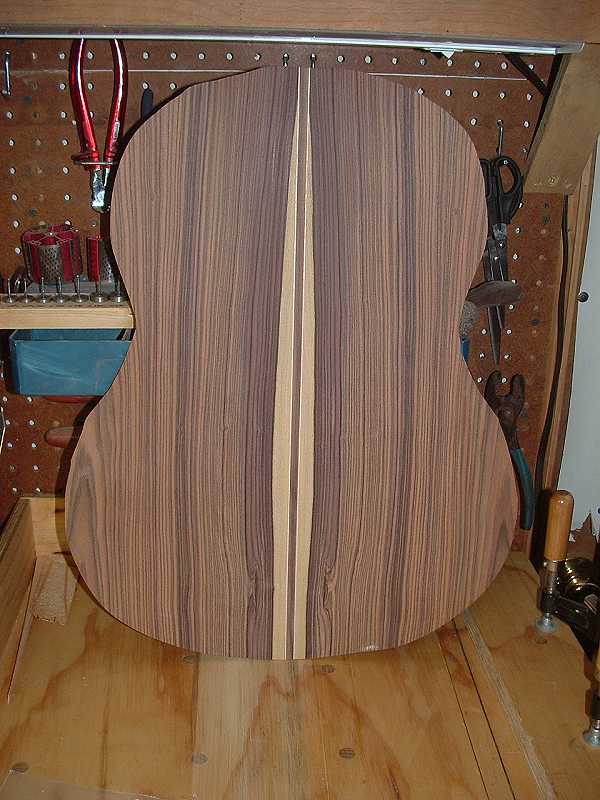
Meanwhile, I've bent guitar 8's sides and joined the back
set. Tell you what, I really like working with Bolivian rosewood.
Now, I know that some folks have an allergic reaction to it --
which is a pity, really. This wood is at least as easy to bend
as walnut, smells just like rosewood, has a great tap tone, and
even looks nice!
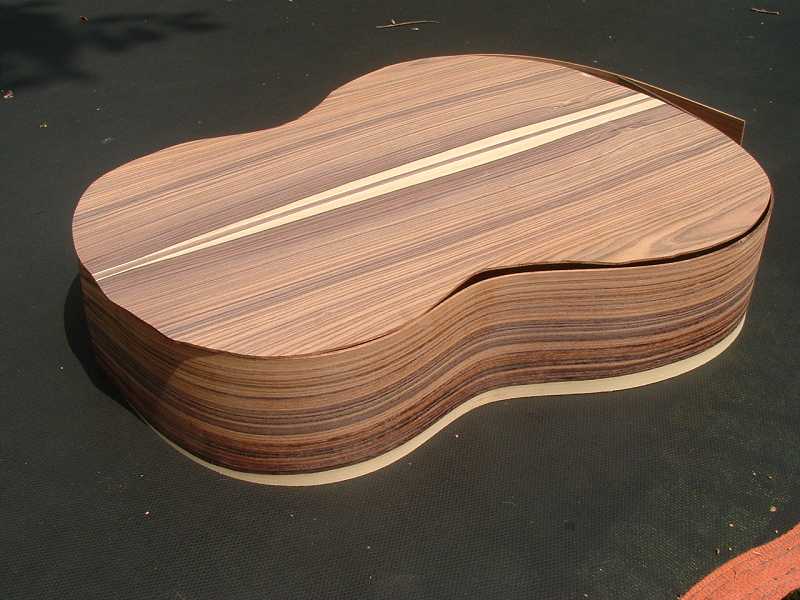
Here's a couple of mock-up shots of what the box will look like
soon.
A close up of guitar 8's joined back set.
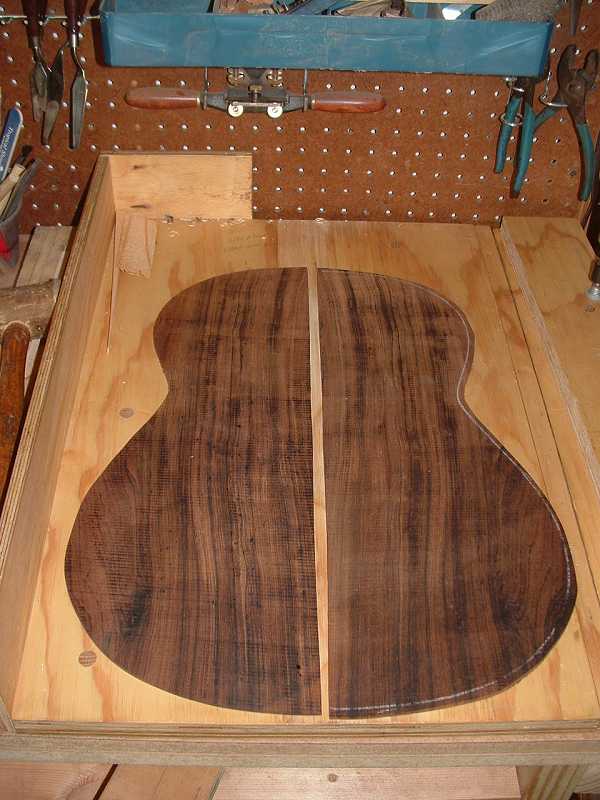
And lastly, a close up of guitar 9's back set. Brazilian. Unfortunately,
Stephen got it pre-cut, so I'll have nothing extra for making
a headplate from, but we've come up with a workaround for that.
That's it for now.
Best, Michael
Apr 22 2005, 07:28 PM
Michael,
Like the looks of that Bolivian RW, pitty I can't use it. Your
placement of the white stripes is excellent too.
Good solution on the too small vice. With care, you will get
the blocks off the neck with no damage. I think violin makers
use this technique quite often. Usually though we read that they
use a thinned down or reduced strength hyde glue. I doubt they
are putting their thinned joints thru the stress you apply though.
I got my 6" machinist vice from Home Depot for about $36.
You don't need the high end vice for holding wood.
So you need a Brazillion RW head plate 11" long? I'll look,
but don't think I have anything that long. Most of my BRW is
shorter or too narrow.
Could you use ebony in the center with BRW on the edge? You might
even find some cocobolo that will look like Brazillion. Those
back pieces for the Brazillion guitar you show are quite dark.
Nice.
Steve
NEXT
PAGE / PAGE 1 / PAGE 2 / PAGE 3 / PAGE
4 / PAGE 5 / PAGE
6 / PAGE 7 / PAGE
8
Home / Articles
/ Gallery / Accessories
/ Builders / Composers
/ Guitarists / Movies
/ Sheet Music / Free
PDFs / Recordings / Teachers
/ Radio / Join
/ Contact Us